
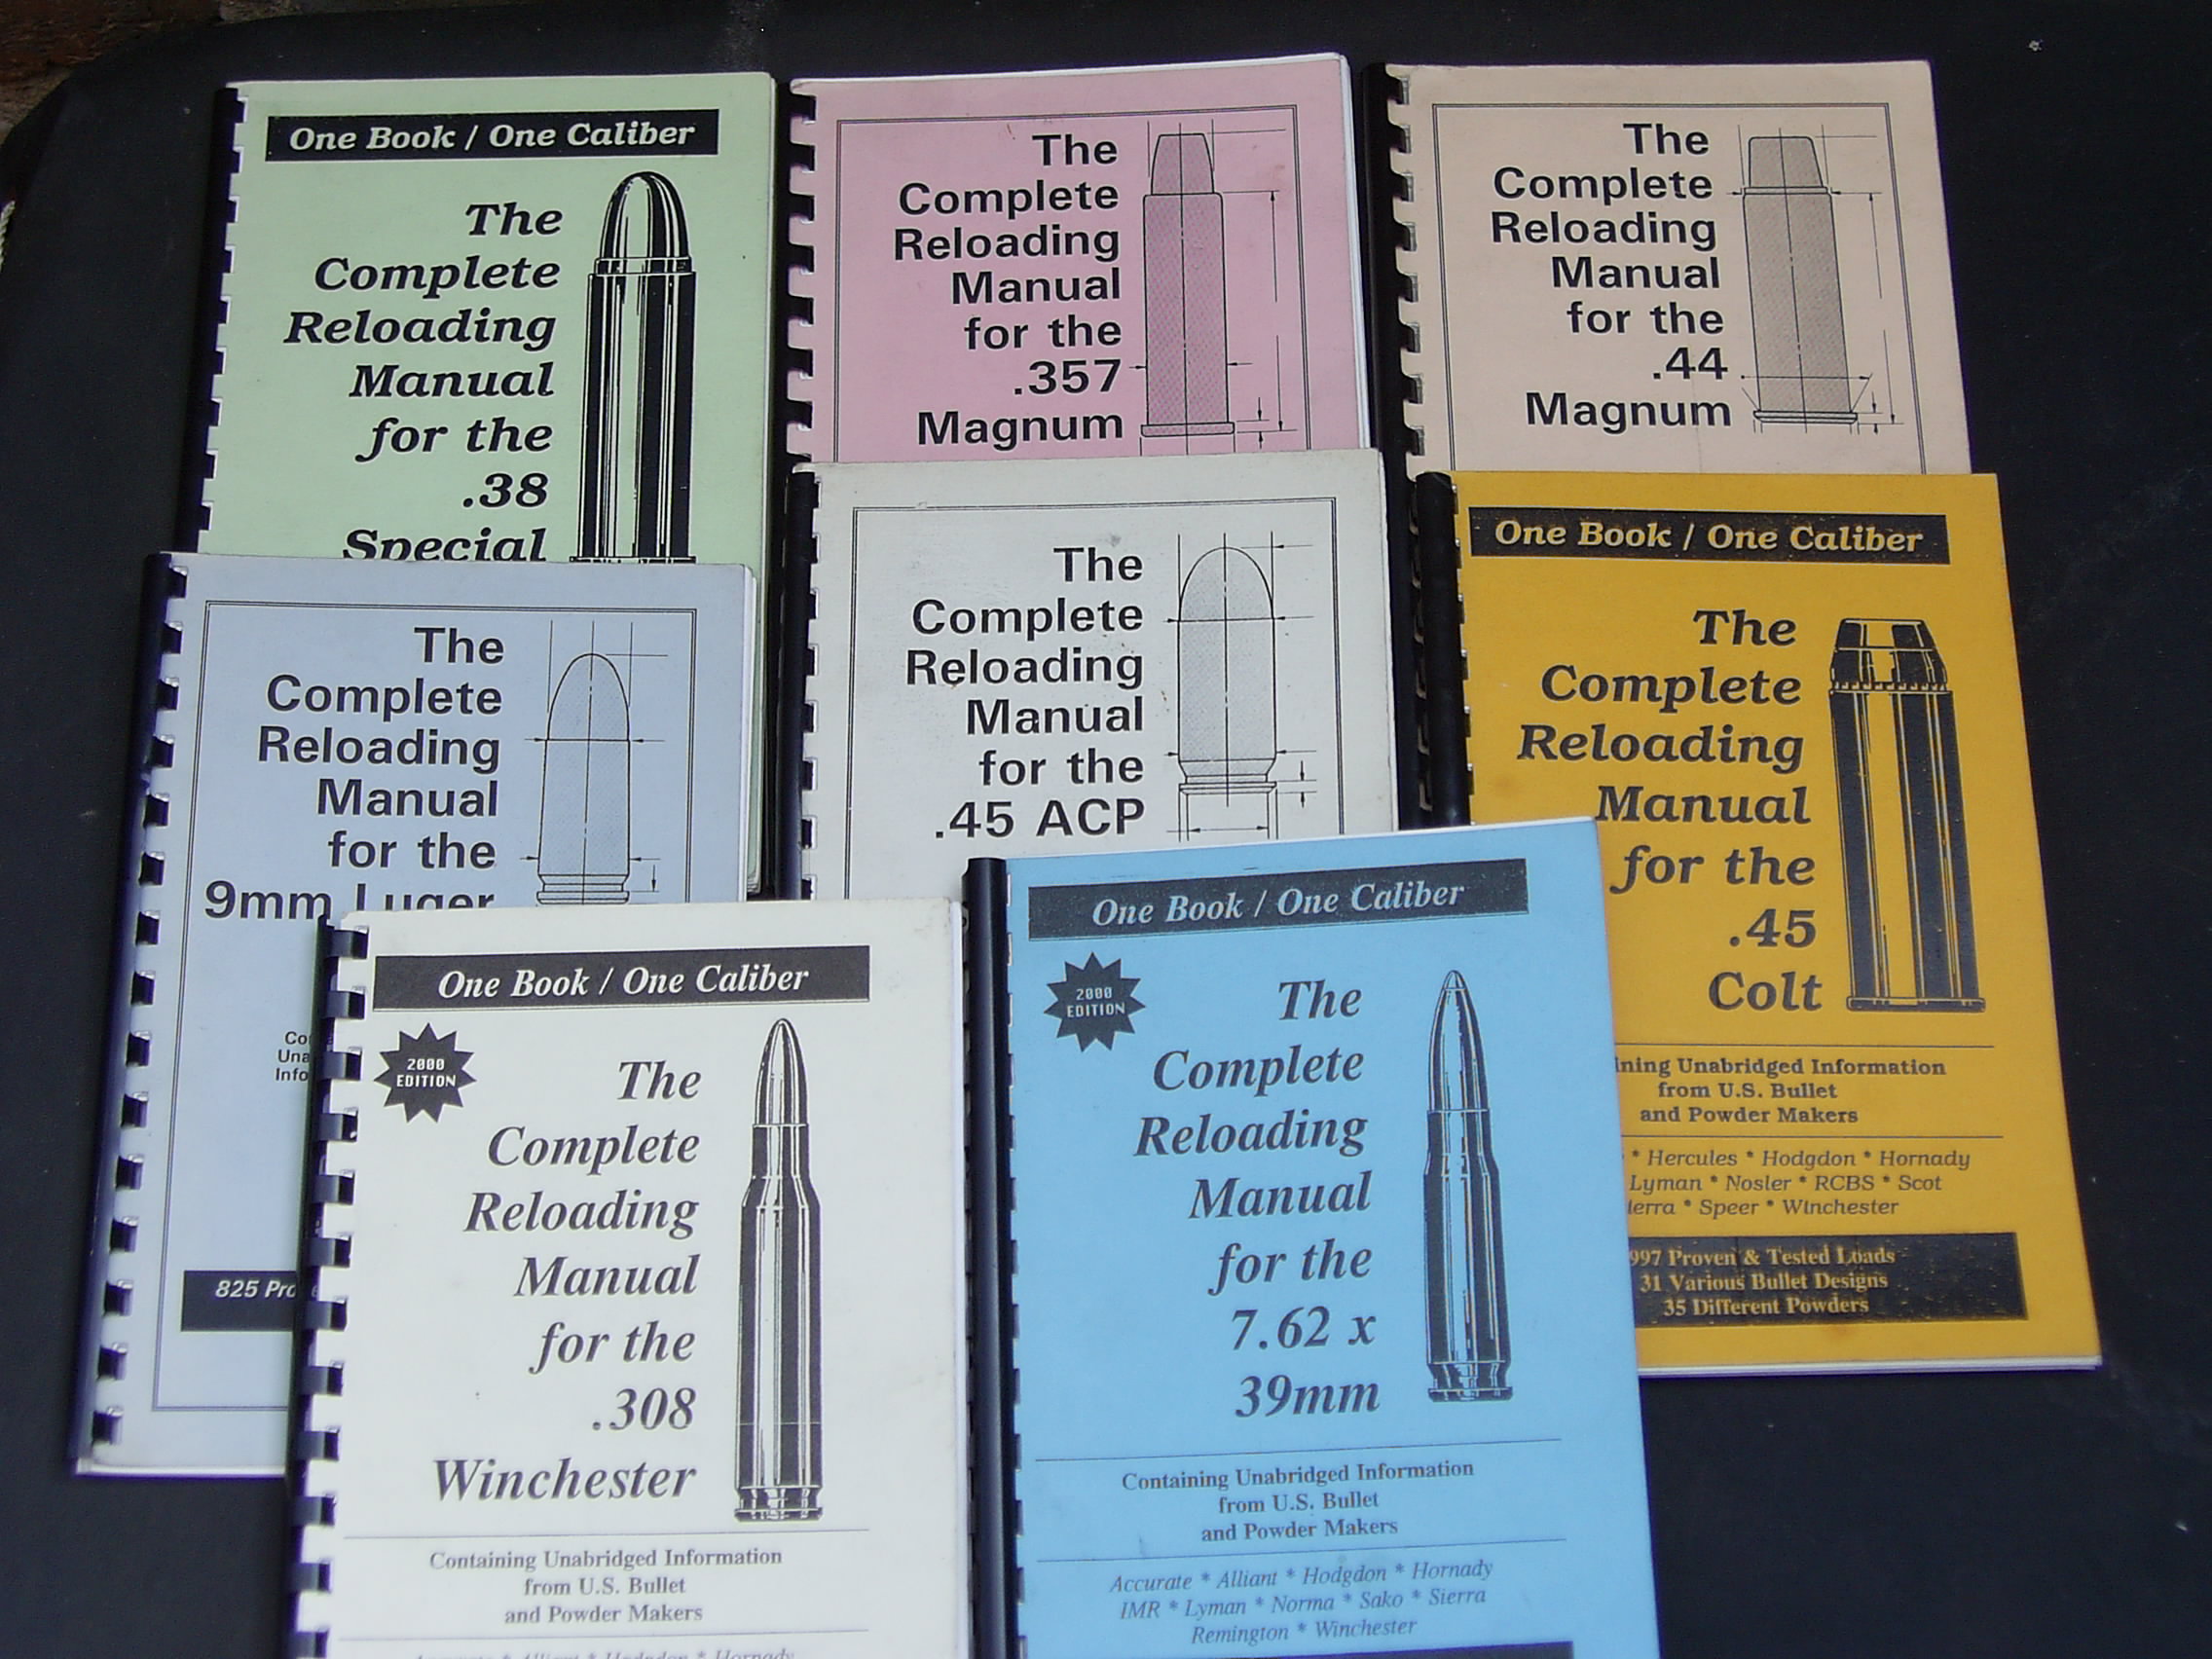
Fig. 1 : A selection of reloading manuals
Fig. 2 : One Book / One Calibre Reloading Manuals
Why should I reload ... what do I need ... and how do I do it ?!?
A guide by Spacegunner (pre-97 nickname)
Uploaded :
Review On :
There are three main reasons to reload your own ammunition :
1. To save money. Reloaded ammunition can save you up to 50% of the cost of buying factory ammunition.
2. To tailor the ammunition to a specific gun or purpose, i.e. to obtain optimum accuracy over a certain distance.
3. To bring an obsolete calibre firearm back into service.
There is another reason, the knowledge that the ammunition you have reloaded has just won you first place in that competition or bagged that trophy deer.
Can Anyone Reload ?
Yes. You do not need a degree in nuclear physics to reload. A monkey can do the physical moving a case and pulling a lever part of reloading. However, it does take common sense (and an FAC) to stay out of trouble.
What Do I Need ?
This will depend on the calibre/s you wish to reload. The pistol calibres, such as .38 special, .357 Magnum and .44 Magnum are easy and need a minimum of equipment, whereas rifle calibres, such as .308 Winchester, require more care and equipment to reload safely.
For this explanation of reloading, I am going to assume that you have just purchased a shiny new lever action rifle in .357 Magnum, and have been considering reloading your own .357 Magnum ammunition but have been getting confused by all the ‘helpful’ advise given to you by firearms dealers and other shooters.
So, Down To Basics...
The first thing you will need is a good reloading handbook. There are many to choose from, all written by the various powder, ammunition and reloading equipment manufactures. Among these are Lee (we will hear more about Lee equipment later), Lyman, Speer (part of the RCBS group), Hodgdon, Alliant (formerly Hercules) and Vhitaviouri.
Another good source of reloading data is a series of books called Loadbooks. These are basically one book on one calibre. They contain a collection of data from most of the loading manuals all to do with one calibre, i.e. .357 Magnum.
There are other sources of reloading data, such as the Internet and articles in the shooting magazines, however the data given in such articles may not be safe to use in your rifle, there is usually a disclaimer at the end of the article.
|
|
|
|
Fig. 1 : A selection of reloading manuals |
Fig. 2 : One Book / One Calibre Reloading Manuals |
So, you have chosen your manual. Now, read the info on reloading, especially the don’ts, and the reloading data on the .357 Mag as well as the data on the .38 Special. This will help you to select your components, as the.357 Mag rifle will also shoot the .38 Special round as well and you may wish to load both calibres.
When selecting your powder, if you want to load .357 and .38, choose a powder that can be used in both calibres to start with. It is easy to make a mistake and use a .357 Magnum load in a .38 Special case. If this happens, bye-bye gun and possibly self as well as the shooters next to you. I will explain how to avoid or at least minimize this later.
So now we have a manual and a powder, now we need cases.
These can be purchased unfired, once fired or saved after firing factory ammunition. Beware buying once fired cases, sometimes they have been fired and reloaded a few times and may be on their way out. The way to check if they are once fired is to look inside the case, if it is still reasonably shiny and clean inside it is once maybe twice fired at most. If it is very dirty, it ain’t once fired.
Begging or stealing cases are other options, but be careful.
If you are going to load both .357 Mag and .38 Special, make sure you do not mix them up in the same container/bag/ammo box, as this can lead to problems. More on this later.
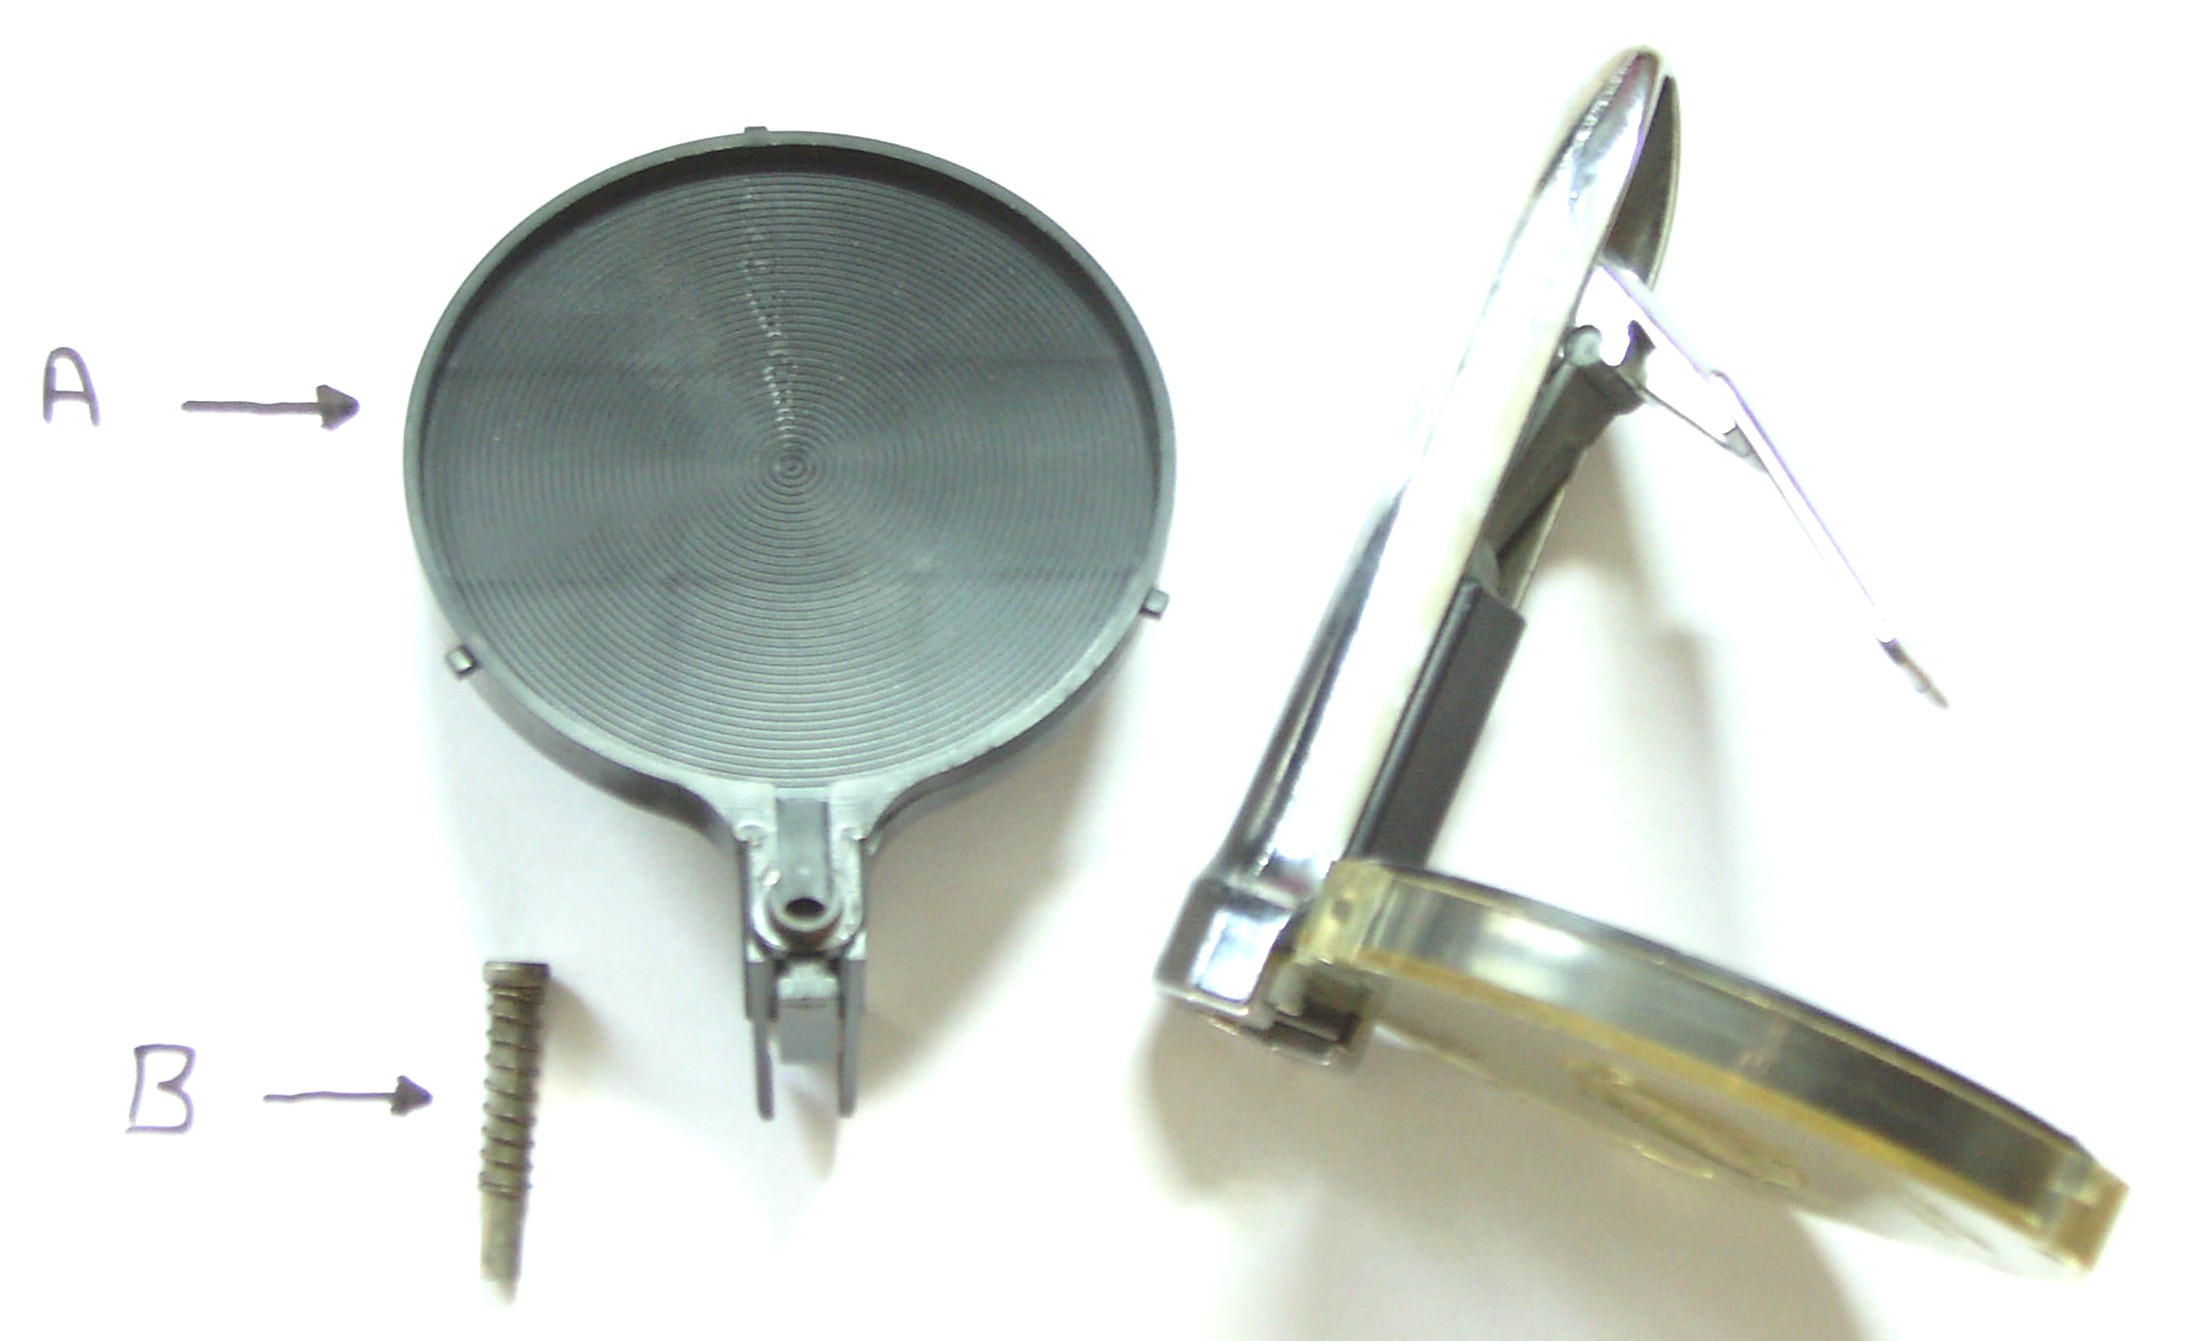
 |
Fig. 3 : Anatomy of a Case
A. Neck of case B. Head of case C. Primer pocket D. Rim E. Extraction groove F. Body G. Flash hole |
You have a manual, a powder, and some cases now you need a bullet.
The most common bullet used in .357 Magnum lever action rifles is the 158-grain lead semi-wadcutter (LSWC) or round nose flat point (RNFP). These are the safest bullets to use due to their design of having a flat tip instead of a pointed profile.
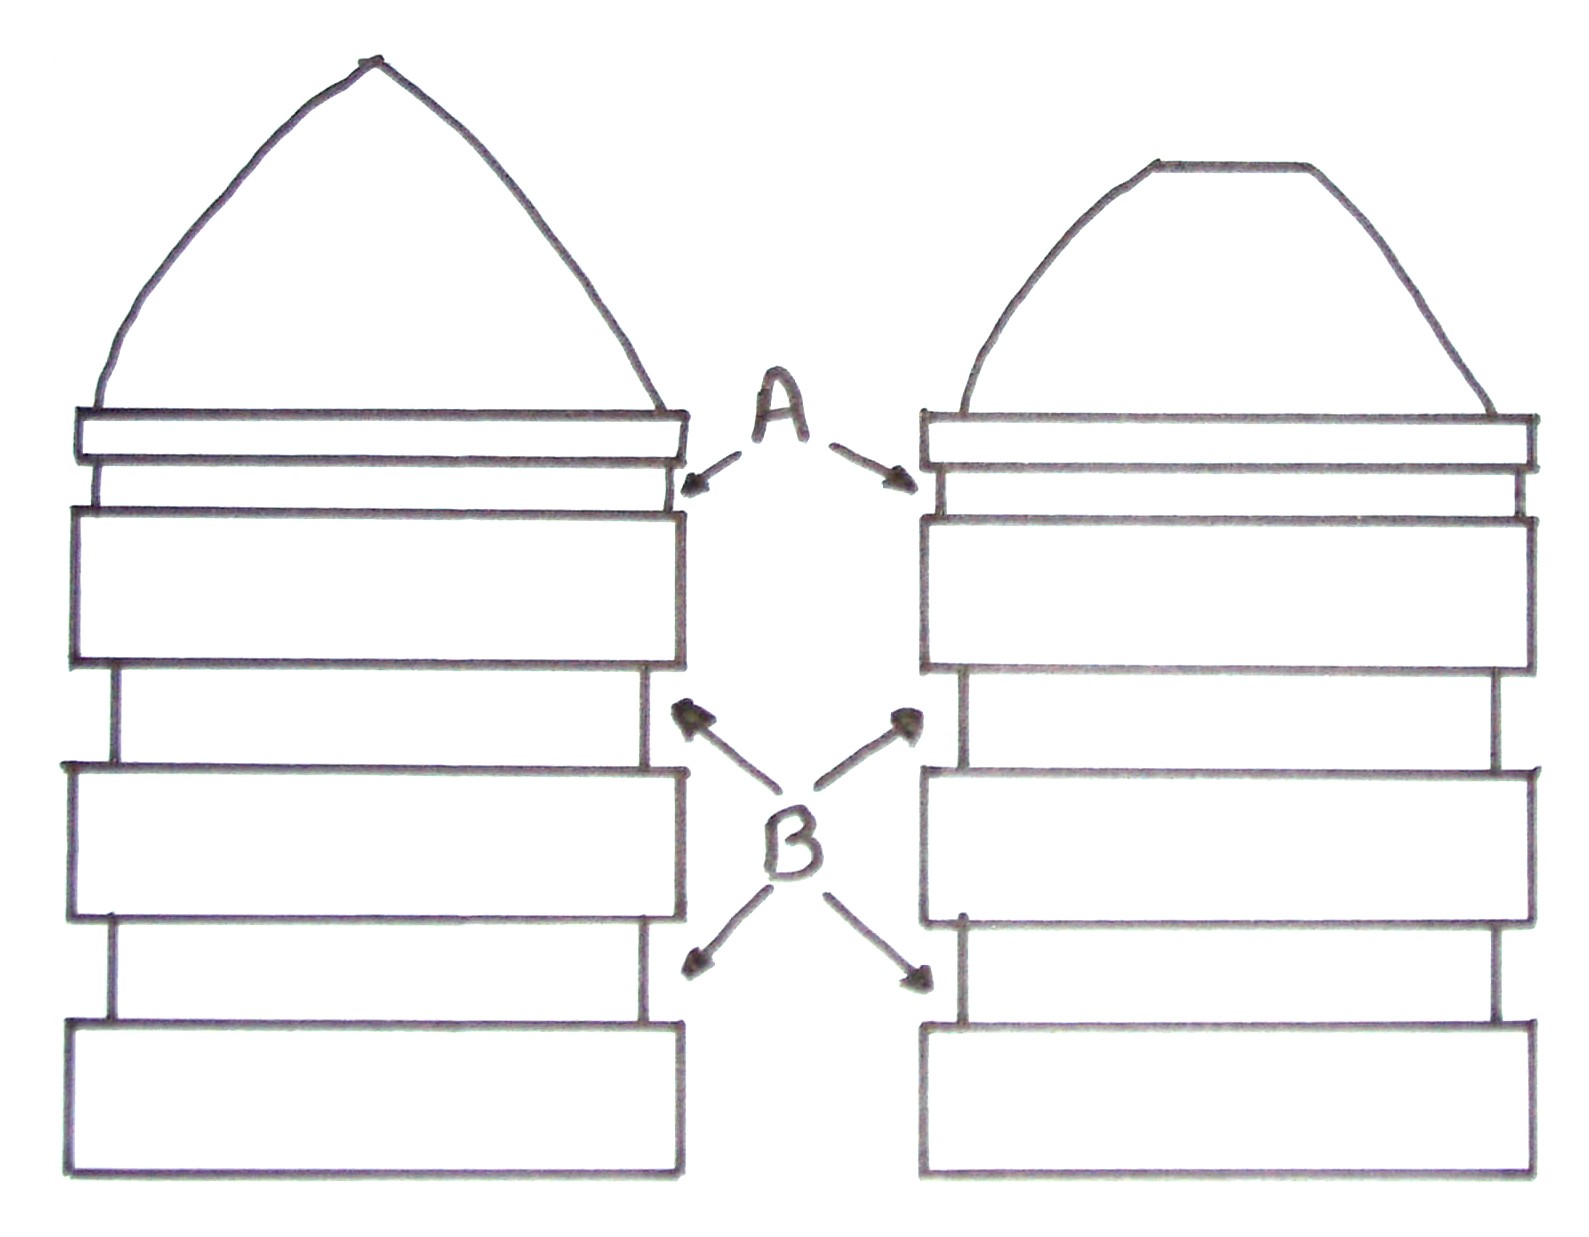 |
Fig. 4 : Comparison of the round nose bullet to the round nose flay point bullet.
A. Crimping Groove or Cannelure B. Lube Grooves
|
Consider. You have just loaded 5 rounds into your rifle, if you could see into the magazine you would see that the bullet of the second round loaded is resting against the primer of the first round, and so on. Now, imagine what could happen if all those bullets were pointed and the rifle was dropped either butt down or muzzle down onto a hard surface. A pointed bullet would act like a firing pin, nasty.
The diameter of the tip of a LSWC or RNFP is larger than the diameter of the primer so the risk of a chain fire or magazine explosion is cut to virtually zero.
So the choice of bullets is down to those which have a flat tip, be they made of lead or are jacketed either full metal jacket (FMJ) or total metal jacket (TMJ). A Jacketed bullet is a lead core covered by a jacket of either steel or gilding metal (a copper-zinc alloy). A FMJ bullet usually has the base of the core exposed whereas in the TMJ the core is totally covered.
One other thing to take into consideration when selecting your bullet is availability, can you get them from your local supplier easily. You do not have to use the bullet listed in the reloading data, an equivalent bullet of the same style and weight can be used.
Please note, however, some bullet profiles may not feed in your rifle, either the nose is too long or too short. I have found this happening when using some semi-wadcutter bullets in a Winchester 94AE, so load a few dummy rounds and try cycling them through your rifle before loading live rounds (see later on how to load dummy rounds).
Also, they may cut down the magazine capacity of your rifle by one round. Next you need primers.
The primer is the detonator, which when hit by the firing pin, ignites the powder charge and send the bullet down the barrel and into the 10 ring (or not).
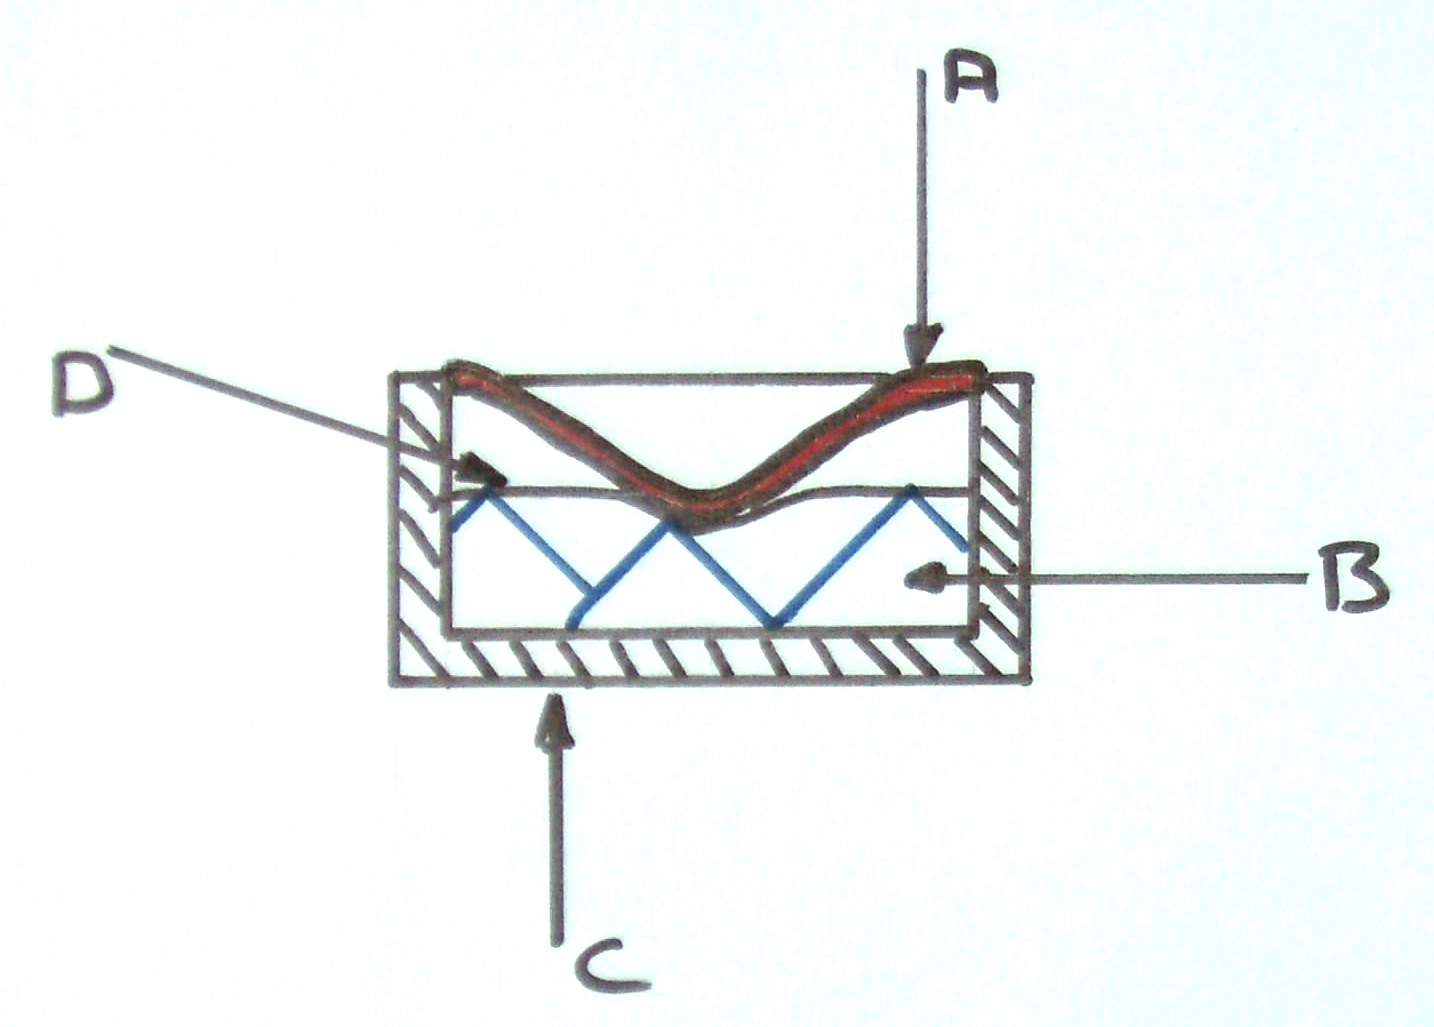 |
Fig. 5 : The Boxer Primer
A. Anvil. B. Primer Compound. C. Cup D. Foil |
These come in four main types, large and small pistol and large and small rifle and are of the Boxer type (See figure 5). The Berdan primer is rare and does not really need to be considered unless you are going to reload military cases or an obsolete calibre. Your reloading manual will usually tell you which type of primer you will need for each calibre. There are also specialist primers, usually used for a specific job, but for loading .357 Mag. you will need small pistol primers.
Primers are usually sold in cartons of 1000 each carton usually contains 10 inners each holding 100 primers. Some Dealers/shops may sell primers in 100’s, but in is best to purchase them in 1000 lots, it’s usually cheaper.
The last thing you will need then, are some boxes to keep your ammunition in, you know, those fancy multi coloured boxes most shooters keep their ammo in. these can hold either 20-, 50-, or 100 rounds depending on the manufacturer.
You now have all the ingredients to load world-class ammunition, so it is time to get the gear to assemble it.
The actual equipment required can be purchased new, second hand or, of course, begged, stolen or borrowed from friends.
First of all you will need an ‘Area of Work’, somewhere to set up your equipment. This area should be well lit with a good solid bench, ample storage space and have no distractions. Depending on your personal circumstances this will usually be the attic, shed or garage.
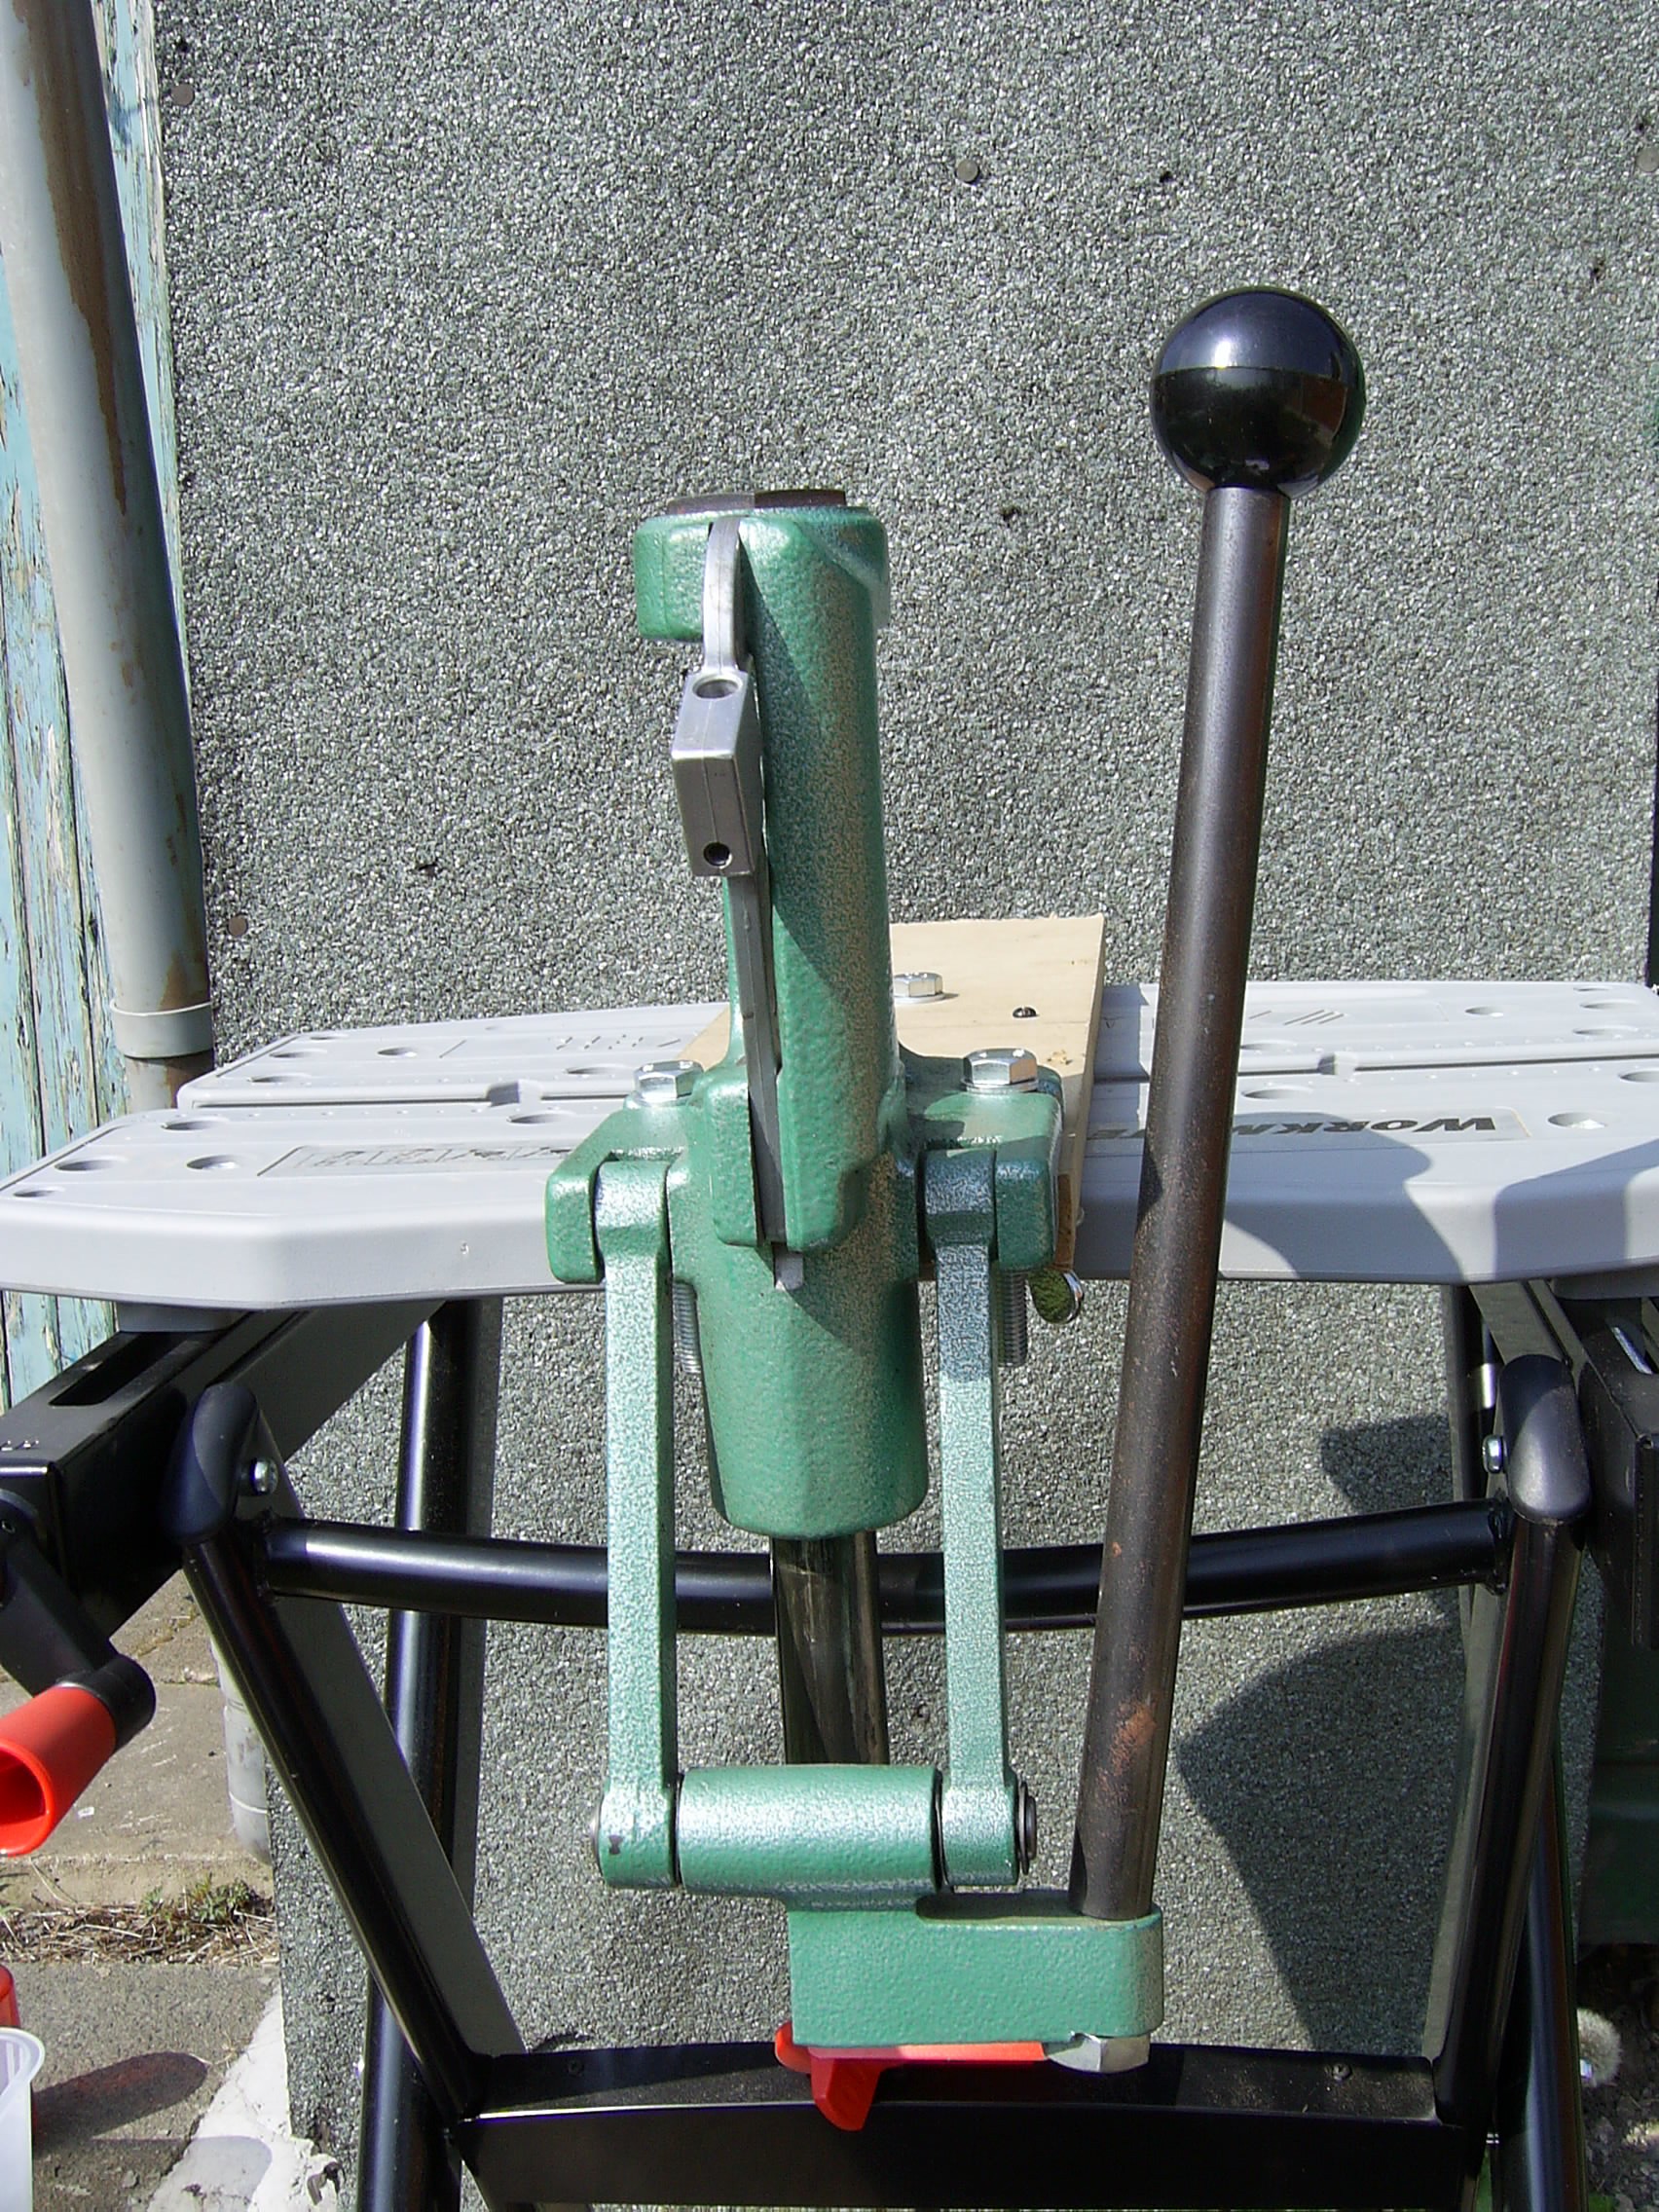
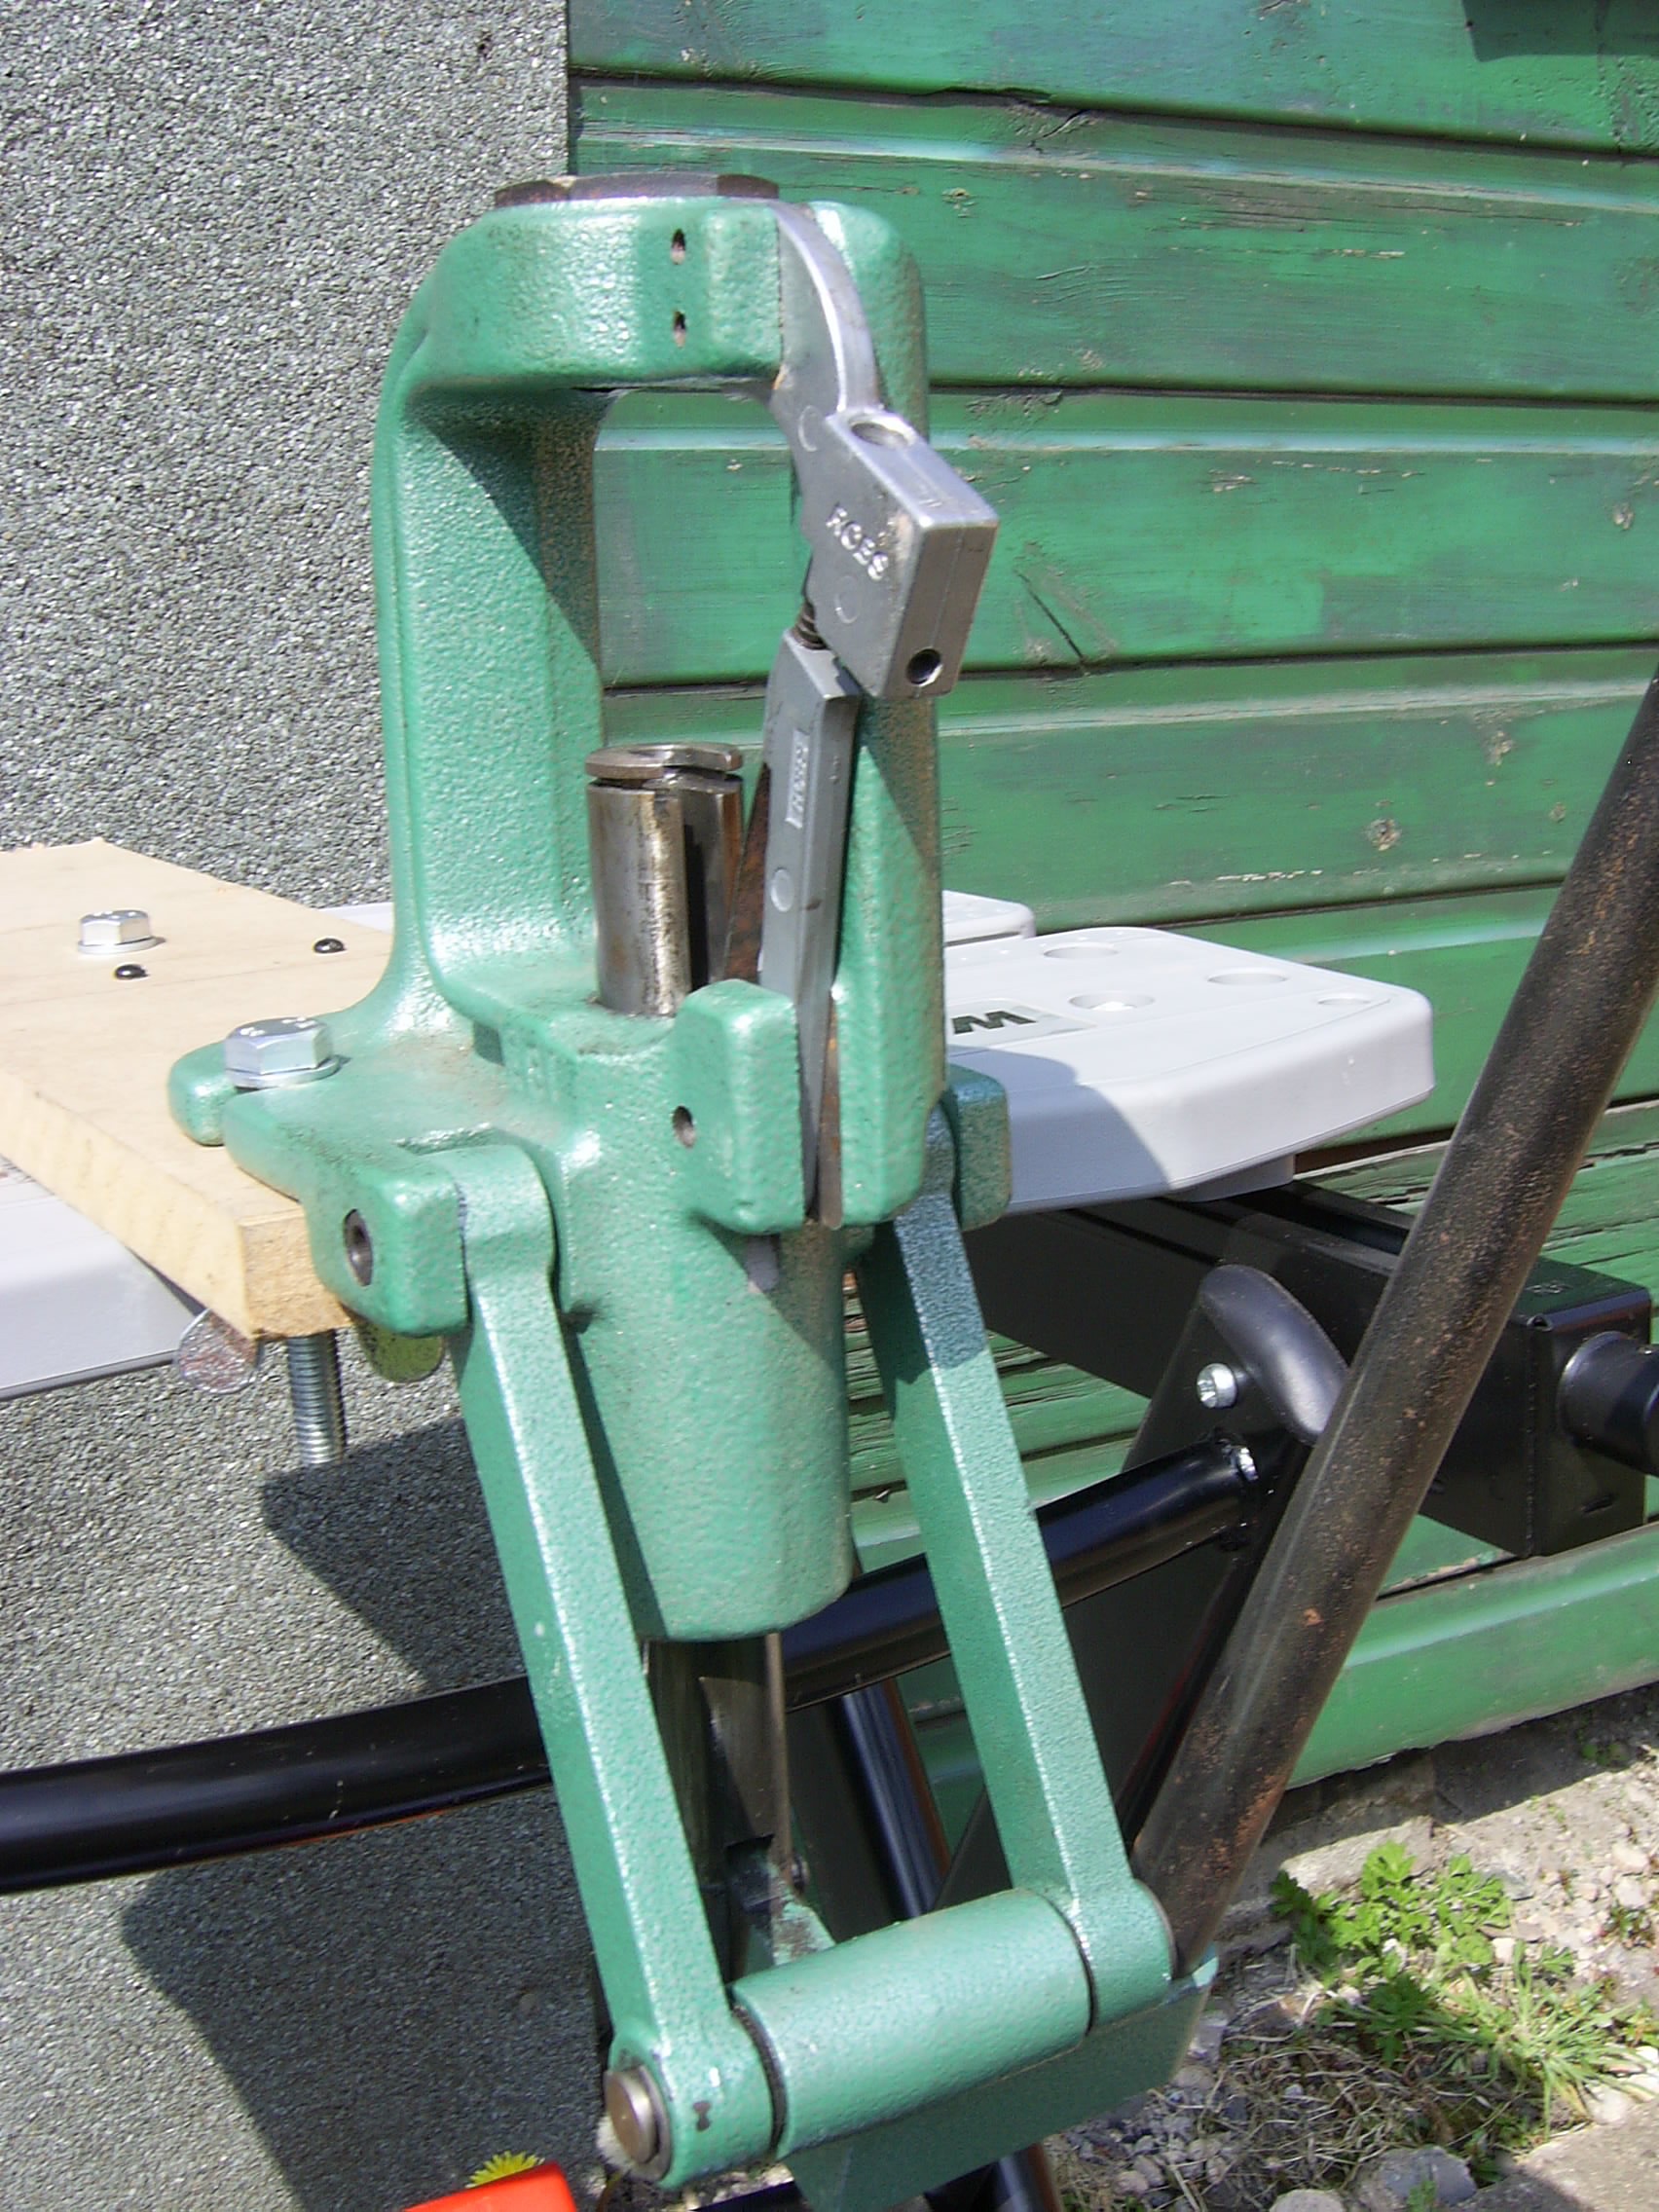
There are four main types of reloading press available. I will explain more about these later, but for now the novice reloader I would suggest either the single stage / ‘O’ press or the turret press, both of these are bench mounted.
For this explanation I will describe the process using a single stage or ‘O’ press. This is because I haven’t got a turret press and in my opinion, the progressive presses are too complicated for a first time reloader.
There are 3 main suppliers of reloading equipment, which are easily available Lee, RCBS and Lyman. There are others, such as Hornady and Redding, but these are not readily stocked by most Dealers or advertised in the shooting magazines.
So, Lee, RCBS or Lyman, which is it to be? I can see 2 main considerations. Cost and availability. Another consideration is which colour do you like? Red (Lee), green (RCBS) or orange (Lyman).
I, personally, use a RCBS Rockchucker single stage press for reloading rifle ammunition and the Lee Pro 1000 progressive press for pistol calibres. My first ‘real’ press was a Lee Challenger single stage press, so I would recommend either the Rockchucker or Challenger press for a first timer. I have no personal experience of using any of the Lyman single stage presses, but I would have no problem in buying one should I need a new press.
 |
 |
|
Fig. 6 : RCBS Rockchucker Press |
Fig. 7 : RCBS Priming System Fitted |
A pistol die set usually consists of 3 dies and a case or shellholder for that calibre, they are the sizing die, expander die and the seating die.
 |
Fig. 8 : A Lee Pistol Die Set
A. Sizing Die B. Lee 'Powder Thru Expander' Die C. Seating Die
|
A rifle die set usually contains the shell-holder, sizing and seating dies. Some die sets may contain an extra die called a crimping die, or if required this die can be purchased separately.
If I were to need to purchase another set of dies to reload another pistol calibre, I would purchase a set made by Lee for 2 reasons. First, they have a tungsten carbide sizing die, which does away with having to lubricate each case prior to sizing, and second, they have the ‘Powder Thru Expander’ die. This means that I can use the Lee Auto Disk Powder Measure, which again cuts out a separate reloading step.
So I will use Lee dies as part of this explanation.
Each of the dies consists of a die body and a locking ring, used to set up the die in the press, then each die has special components, or parts, will enable the die to do its job.
The sizing die contains a tungsten carbide sizing ring at the base of the die, a decapping rod, which in the pistol calibres is universal so should you break it it, is easily replaced as most Lee stockists will carry these as spares, and a decapping rod collet nut.
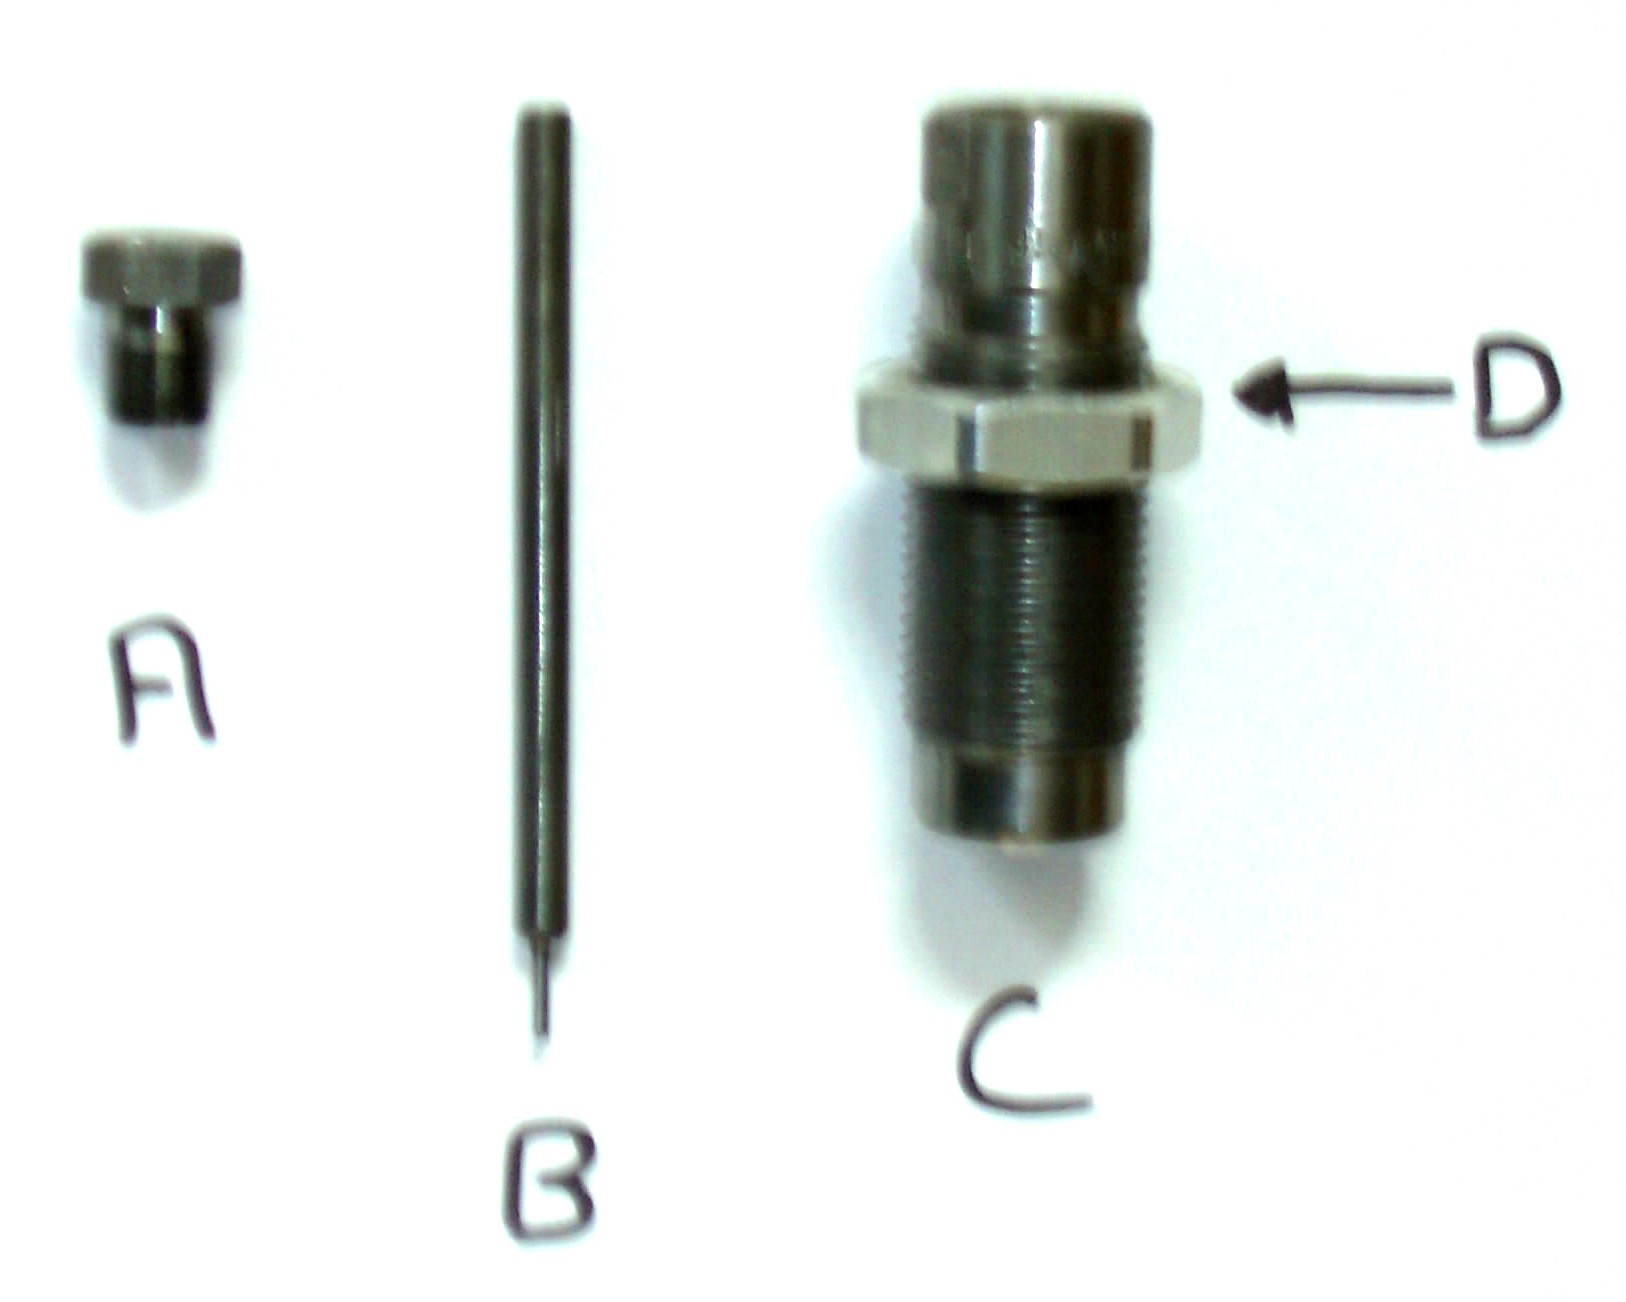 |
Fig. 9 : Anatomy of a Sizing Die
A. Decapping Rod Collet Nut B. Decapping Rod C. Die Body D. Die Locking Nut
|
The Powder Thru Expander die contains a sliding expander sleeve, this is calibre specific, don’t loose it or get it mixed up with another sleeve from a different set of dies, and a powder funnel adapter nut.
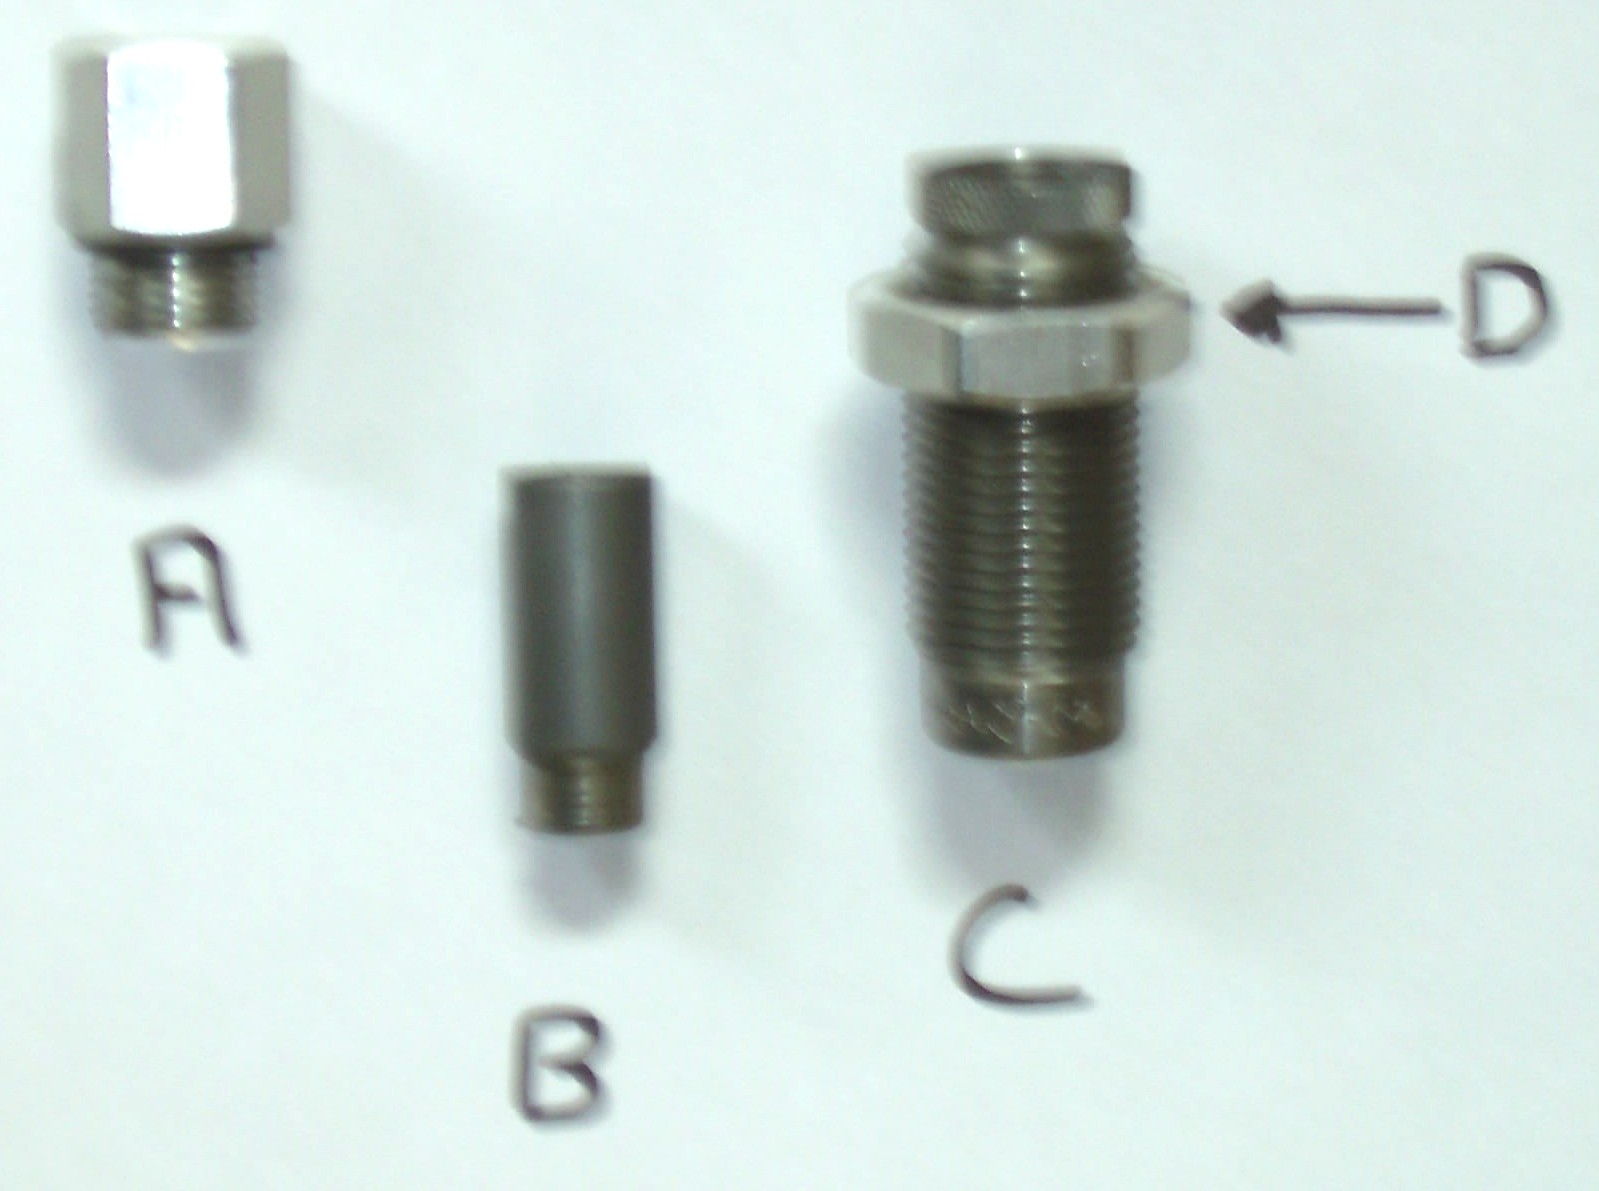 |
Fig. 10 : Anatomy of the Powder Thru Expander Die
A. Funnel Adaptor Nut B. Sliding Expander Sleeve C. Die Body D. Die Lock Nut
|
The seater die consists of a sliding seater plug, which is suitable for use with all bullet shapes, and an adjuster nut. Inside the die body, a step has been machined into it, which crimps the case onto the bullet.
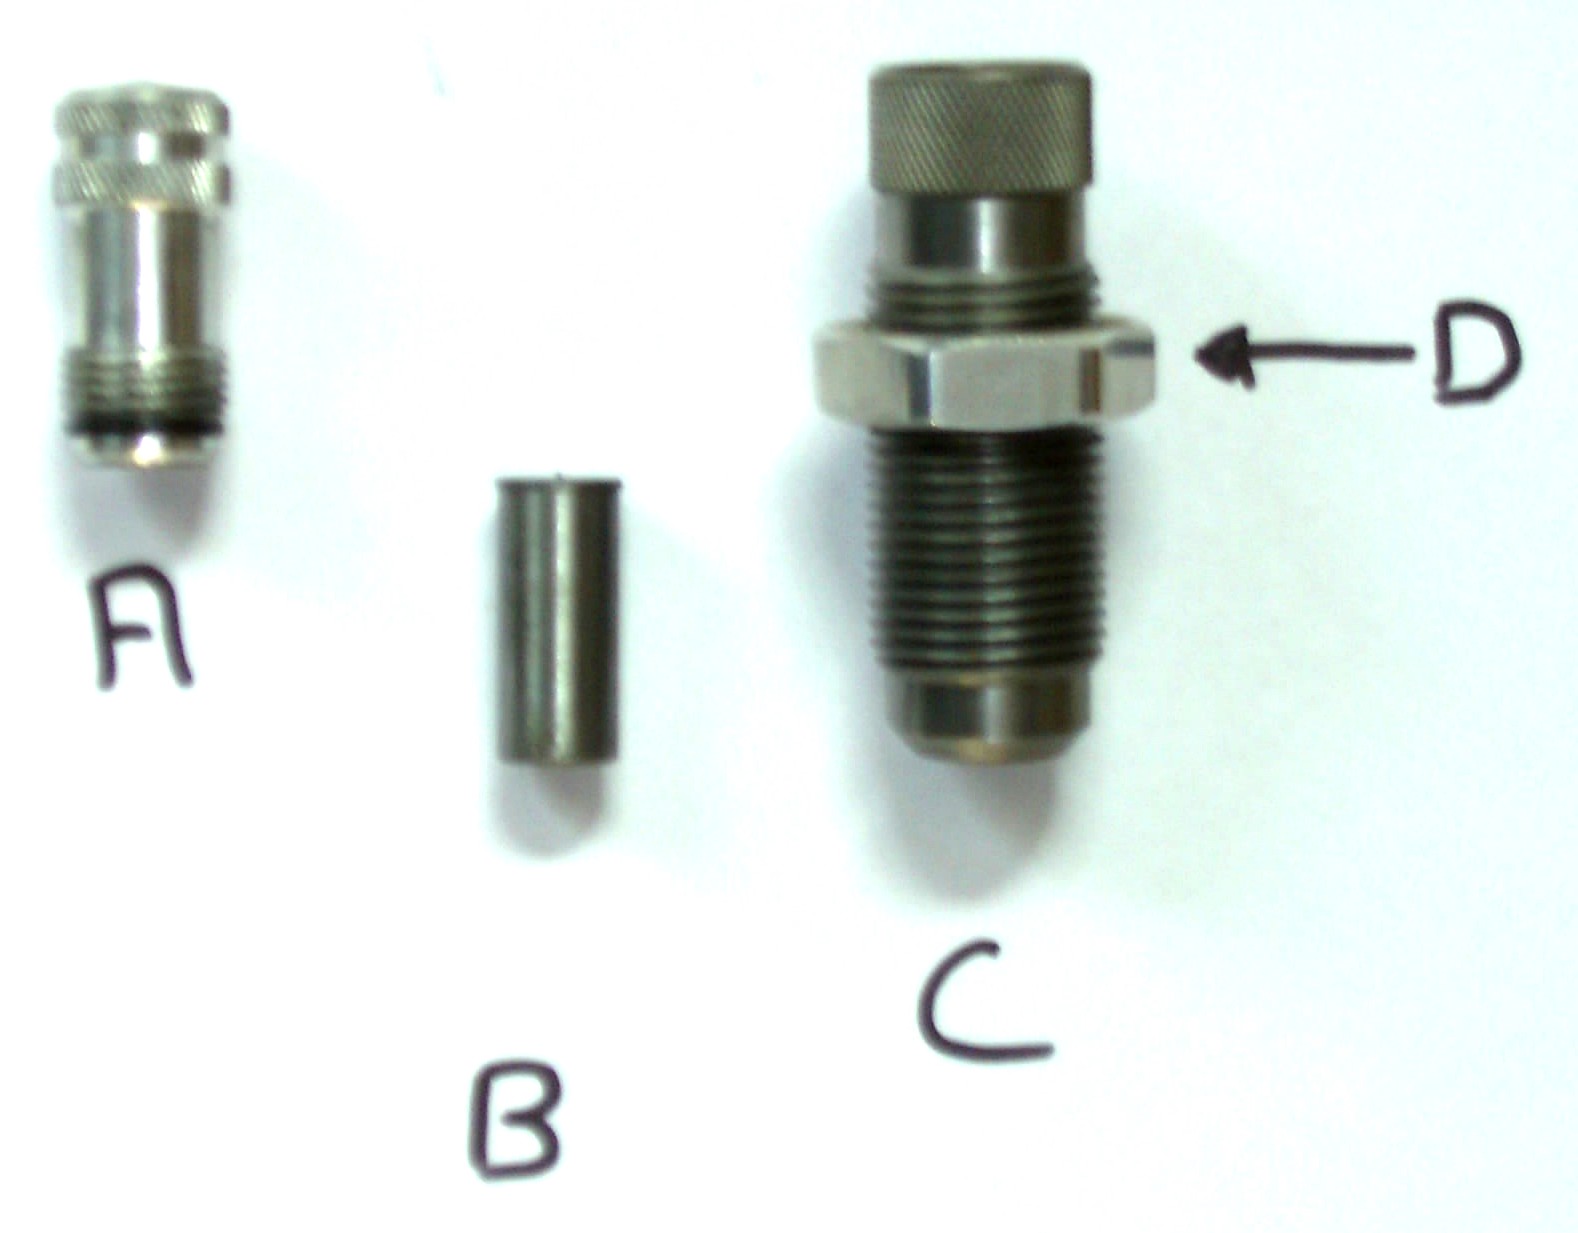 |
Fig. 11 : Anatomy of the Seater Die
A. Adjuster Nut B. Sliding Seater Plug C. Die Body D. Die Locking Nut
|
Powder Measurement
Now you will need so sort of powder measuring/dispensing system.
There are two ways of measuring and dispensing powder, by weight or by volume.
The weighing method is slow, as each load has to be weighed individually, but each charge is exact, this is the method I use for reloading rifle ammunition, due to the large amounts of powder used.
The volume method is the faster and most common method used in pistol calibre reloading. The volume powder measures or throwers work on the principle that Y volume of powder equals X weight of that powder.
As I am using Lee dies, I will use the Lee Auto Disk Measure (ADM), as this will fit onto the Lee expander die and combine two operations into one operation.
There are three grades of ADM. The basic ADM, the Deluxe and the Pro. The ADM consists of a powder container or hopper, a base plate, a spring operated actuator and a set of four disks, each with six progressively larger holes in them, which, if you do the math means that it can dispense 24 different loads of a particular powder. There is also available a Micro Disk which dispenses 6 loads below that of the smallest standard hole of the disks supplied, and a double Disk kit which allows loads higher than those listed on the instruction and data sheet supplied with each ADM.
The hopper on both the basic and Deluxe ADM is held in place by two screws which screw through the base plate and into the hopper, whereas the hopper on the Pro ADM has two bolts attached to it which pass through the base plate and is held in place with two brass knurled nuts. This makes changing disks easier. Also the powder can be turned ‘Off’ when changing loads, whereas the basic and Deluxe ADMs must be emptied of powder before you can change loads.
The choice of ADM is yours, but for this explanation I will use the Pro ADM.
 |
Fig. 12 : Lee Pro ADM
A. Powder Hopper B. Metering Disk C. Base Plate D. Brass Nut
(Spring loaded actuator is just visible behind the nut)
|
Now you have decided on your press, dies and powder thrower, you will need a method of putting the primer into the case.
There are two methods of doing this, by using a hand or press mounted priming system.
The most common hand primer is the Lee AutoPrime. This is my favorite hand primer due to the fact that it is easy to load with primers; it will hold 100 of them, and to change from large to small primers. But, most important, it is portable and can be used anywhere, even when watching the T.V.
It is easy to use, simply fit the correct primer tray and ram, slide in the correct shellholder, remove the cover from the tray, pour in the primers, up to 100, shake the tray gently until all the primers turn base down, replace the lid, insert a case into the shellholder and squeeze.
There are two drawbacks with the AutoPrime, the first is that it uses a dedicated shellholder, they are not the same as the ones used it the press and the second is that some primers are hard to seat, so your thumb will feel it after a while.
The press mounted systems come in two types, what I call the single and the magazine feed.
Single systems, such as the Lee Ram Prime, supplied with the Lee Challenger press, or the Lee T-Bar, supplied with the Lee Turret press, have to be loaded with a single primer at a time.
Whereas, the magazine feed systems, such as the Lee AutoPrime II or the Lyman and RCBS tube feed priming systems work just like the AutoPrime.
The Lee AutoPrime II uses a tray similar to the AutoPrime, whereas the Lyman And RCBS systems use tubes to hold the primers.
The advantages of press-mounted systems are. , 1. They use standard shellholders. 2. The primers are all seated to the same depth and. 3. They make the hardest primers easy to seat.
The disadvantages are. 1. They are not portable. 2. The RCBS and Lyman primers are dedicated systems, designed to be used on the company’s presses, and are not interchangeable with other manufacturers presses. However the Lee AutoPrime II is universal and can be used on any press, which accepts standard dies. 3. The RCBS and Lyman systems are long winded to load with primers. First the primers must be shaken the right way up and loaded into the tube individually.
The choice is yours, but for this explanation, I will assume that you have gone for the T.V. option, the Lee AutoPrime hand primer.
 |
 |
|
Fig. 13 : Lee AutoPrime
A. Second primer tray (large or small primers) B. Second priming ram |
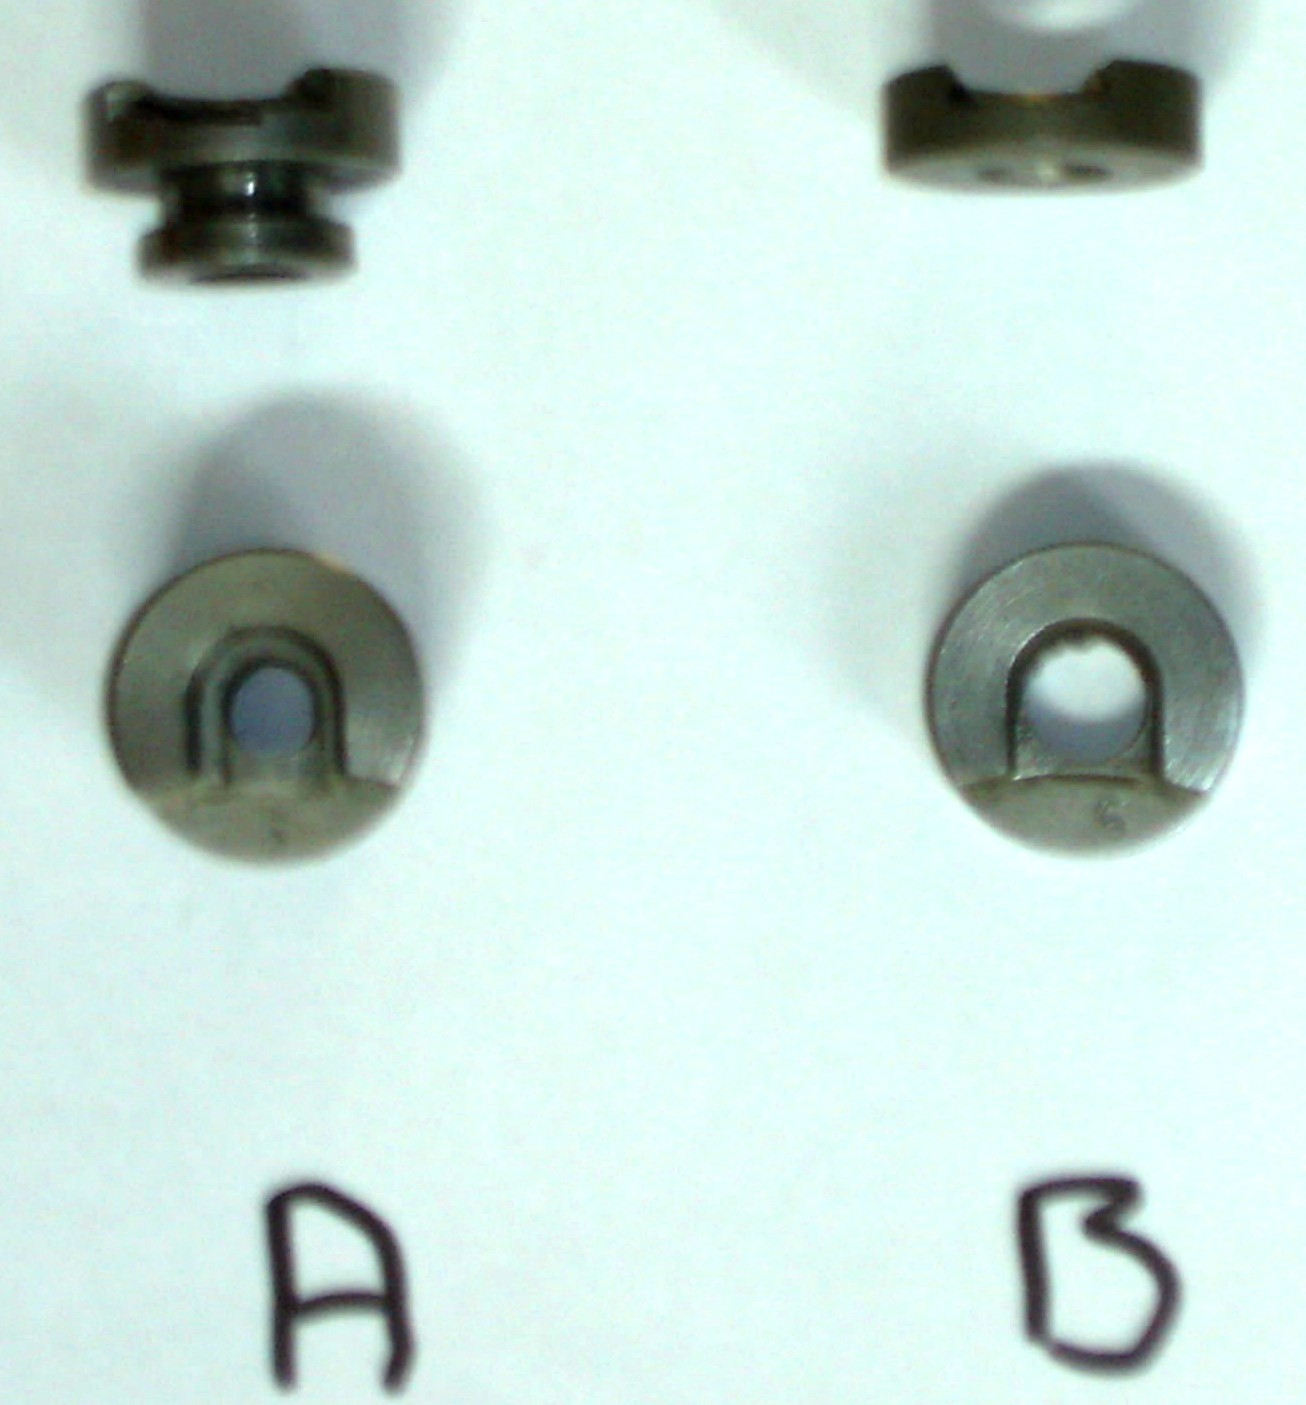
Fig. 14 : Shell Holders
A. Standard B. AutoPrime |
Loading Block
Another essential piece of equipment for anyone using a non-progressive press is a loading tray or block. This is a tray with, usually, 50 holes in it. These holes are large enough to allow the largest case to sit in them rim or head down. It is used to hold the cases when they have been charged with powder to allow you to check that each case has, in fact, been charged and to ‘start’ the bullet into the case.
 |
|
Fig. 15 : RCBS Loading Tray
This model will hold 40x large diameter cases and 40x small diameter cases. |
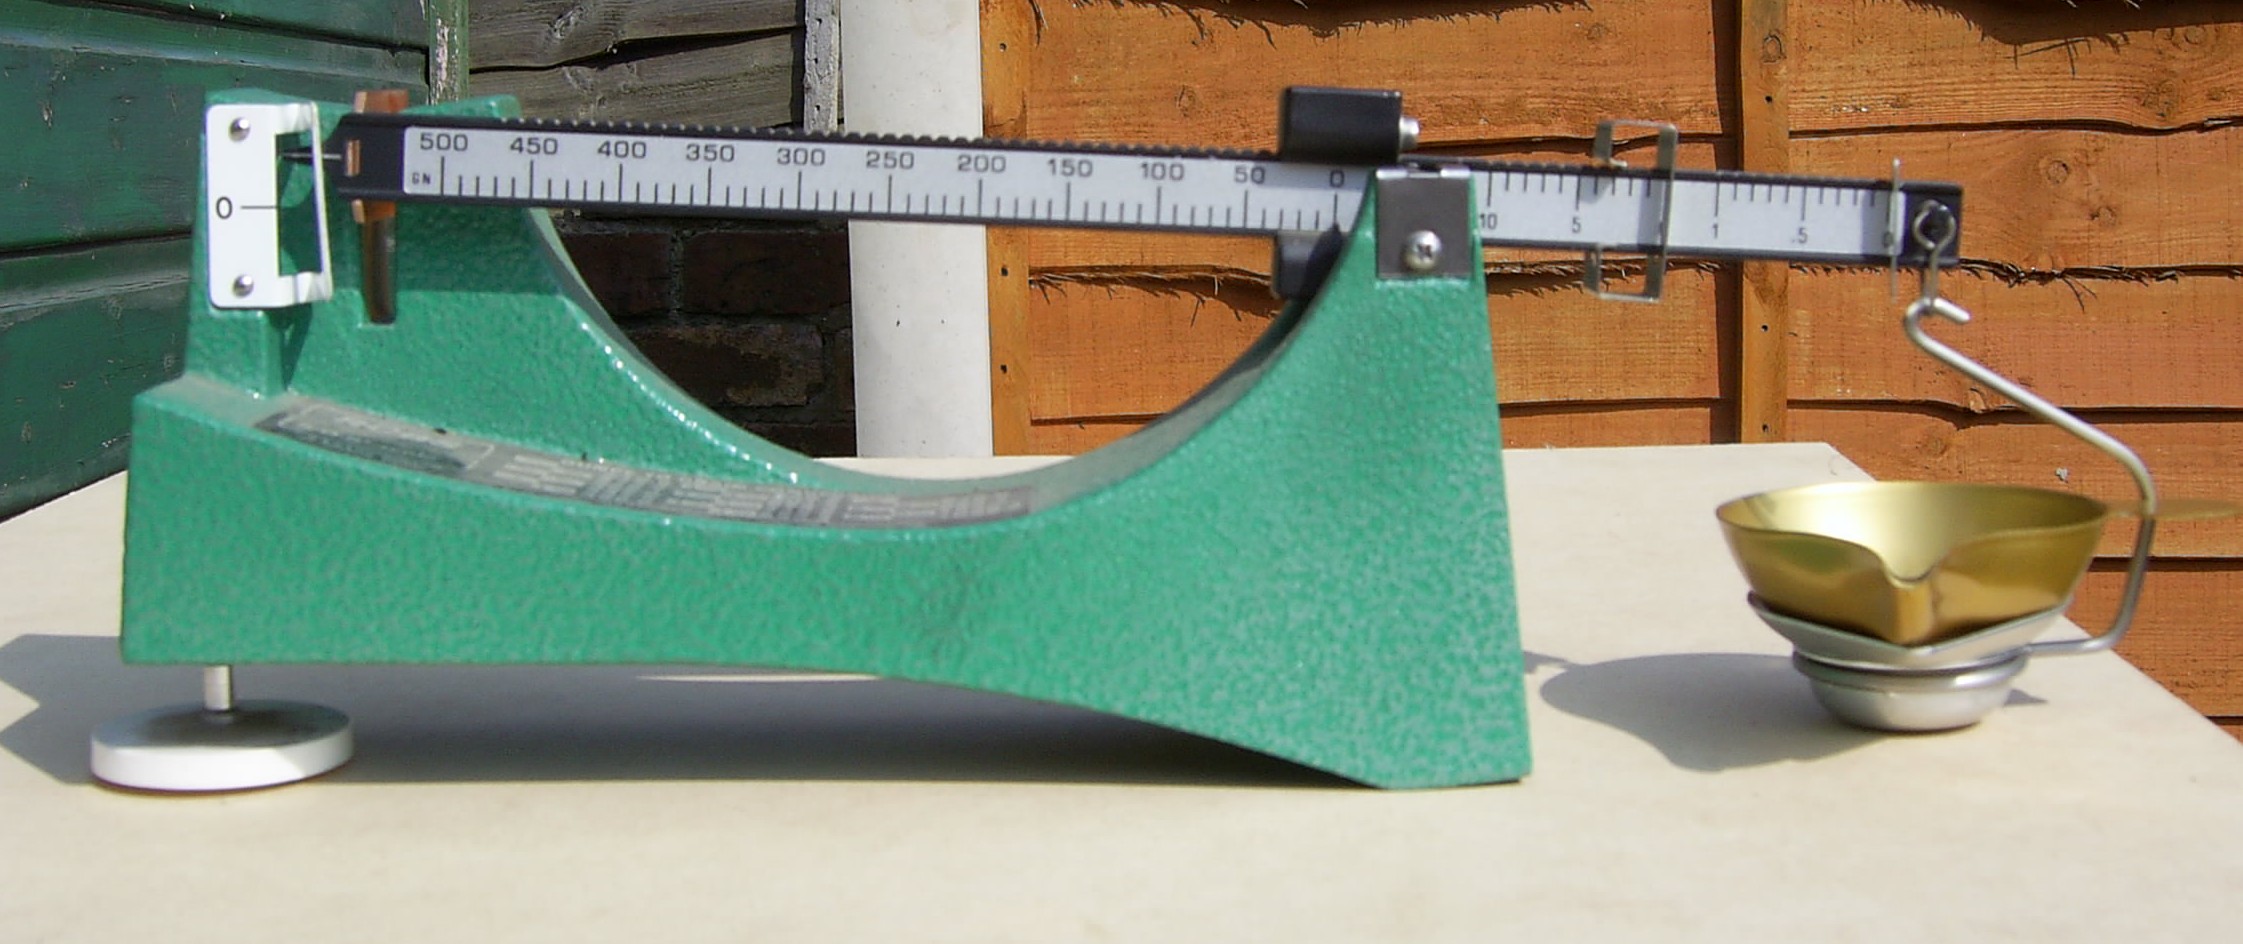
Powder or Reloading Scales
One last piece of equipment required is a set of reloading scales, not to be confused with ordinary scales. There are 7000 grains in a pound of powder, so trying to weigh out 2.8 grains, for example, on kitchen scales is impossible.
These will be needed to check powder charges and the weight of bullets. Remember, it does not always do what it says on the tin, or box.
Reloading scales are calibrated in grains, because British and American ammunition components are weighed in grains. However European ammunition manufacturers use grams so be careful and read the loading data for the powder you are using carefully.
All reloading equipment manufacturers produce scales of various types and weight ranges, so when selecting your scales you need to know the maximum weight you will need to weigh and therefore purchase accordingly.
I use the RCBS 5-0-5 scales, these will weigh from .1 of a grain up to 505 grains, which is plenty of range for the calibres that I reload.
RCBS also do a set of scales that will weigh up to 1010 grains, but I don’t know of many people who reload artillery shells. The 10-0-10 scales are used for the big calibres, such as .50 BMG.
 |
|
Fig. 16 : RCBS 5-0-5 Reloading Scales |
There are other pieces of equipment you will pick up over your reloading career, such as case trimmers, lube pads and brushes, specialist dies etc. but what I have listed is a basic reloading set up.
The Big Three, as I call them, Lee RCBS and Lyman all offer reloading kits. They contain most, if not all, of the items listed above, for the first time reloader. However check the contents of each kit, as Lyman, RCBS and some Lee kits do not come with a set of dies.
How do I use all this equipment to assemble World Class ammunition ?
First of all you will need to mount your press on your bench. I would suggest that you mount the press to the right of center of you bench, leaving enough room to the left of the press for your loading block and scales.
The next stage is to adjust your dies to your press, as these are very rarely set.
To set up the dies :
Step 1. Clip the shellholder into the ram of the press.
Step 2. Take the sizing die (the one with the pin sticking out of the bottom) and screw the locking nut up to the top of the die.
Step 3. Raise the ram to its highest point in the press.
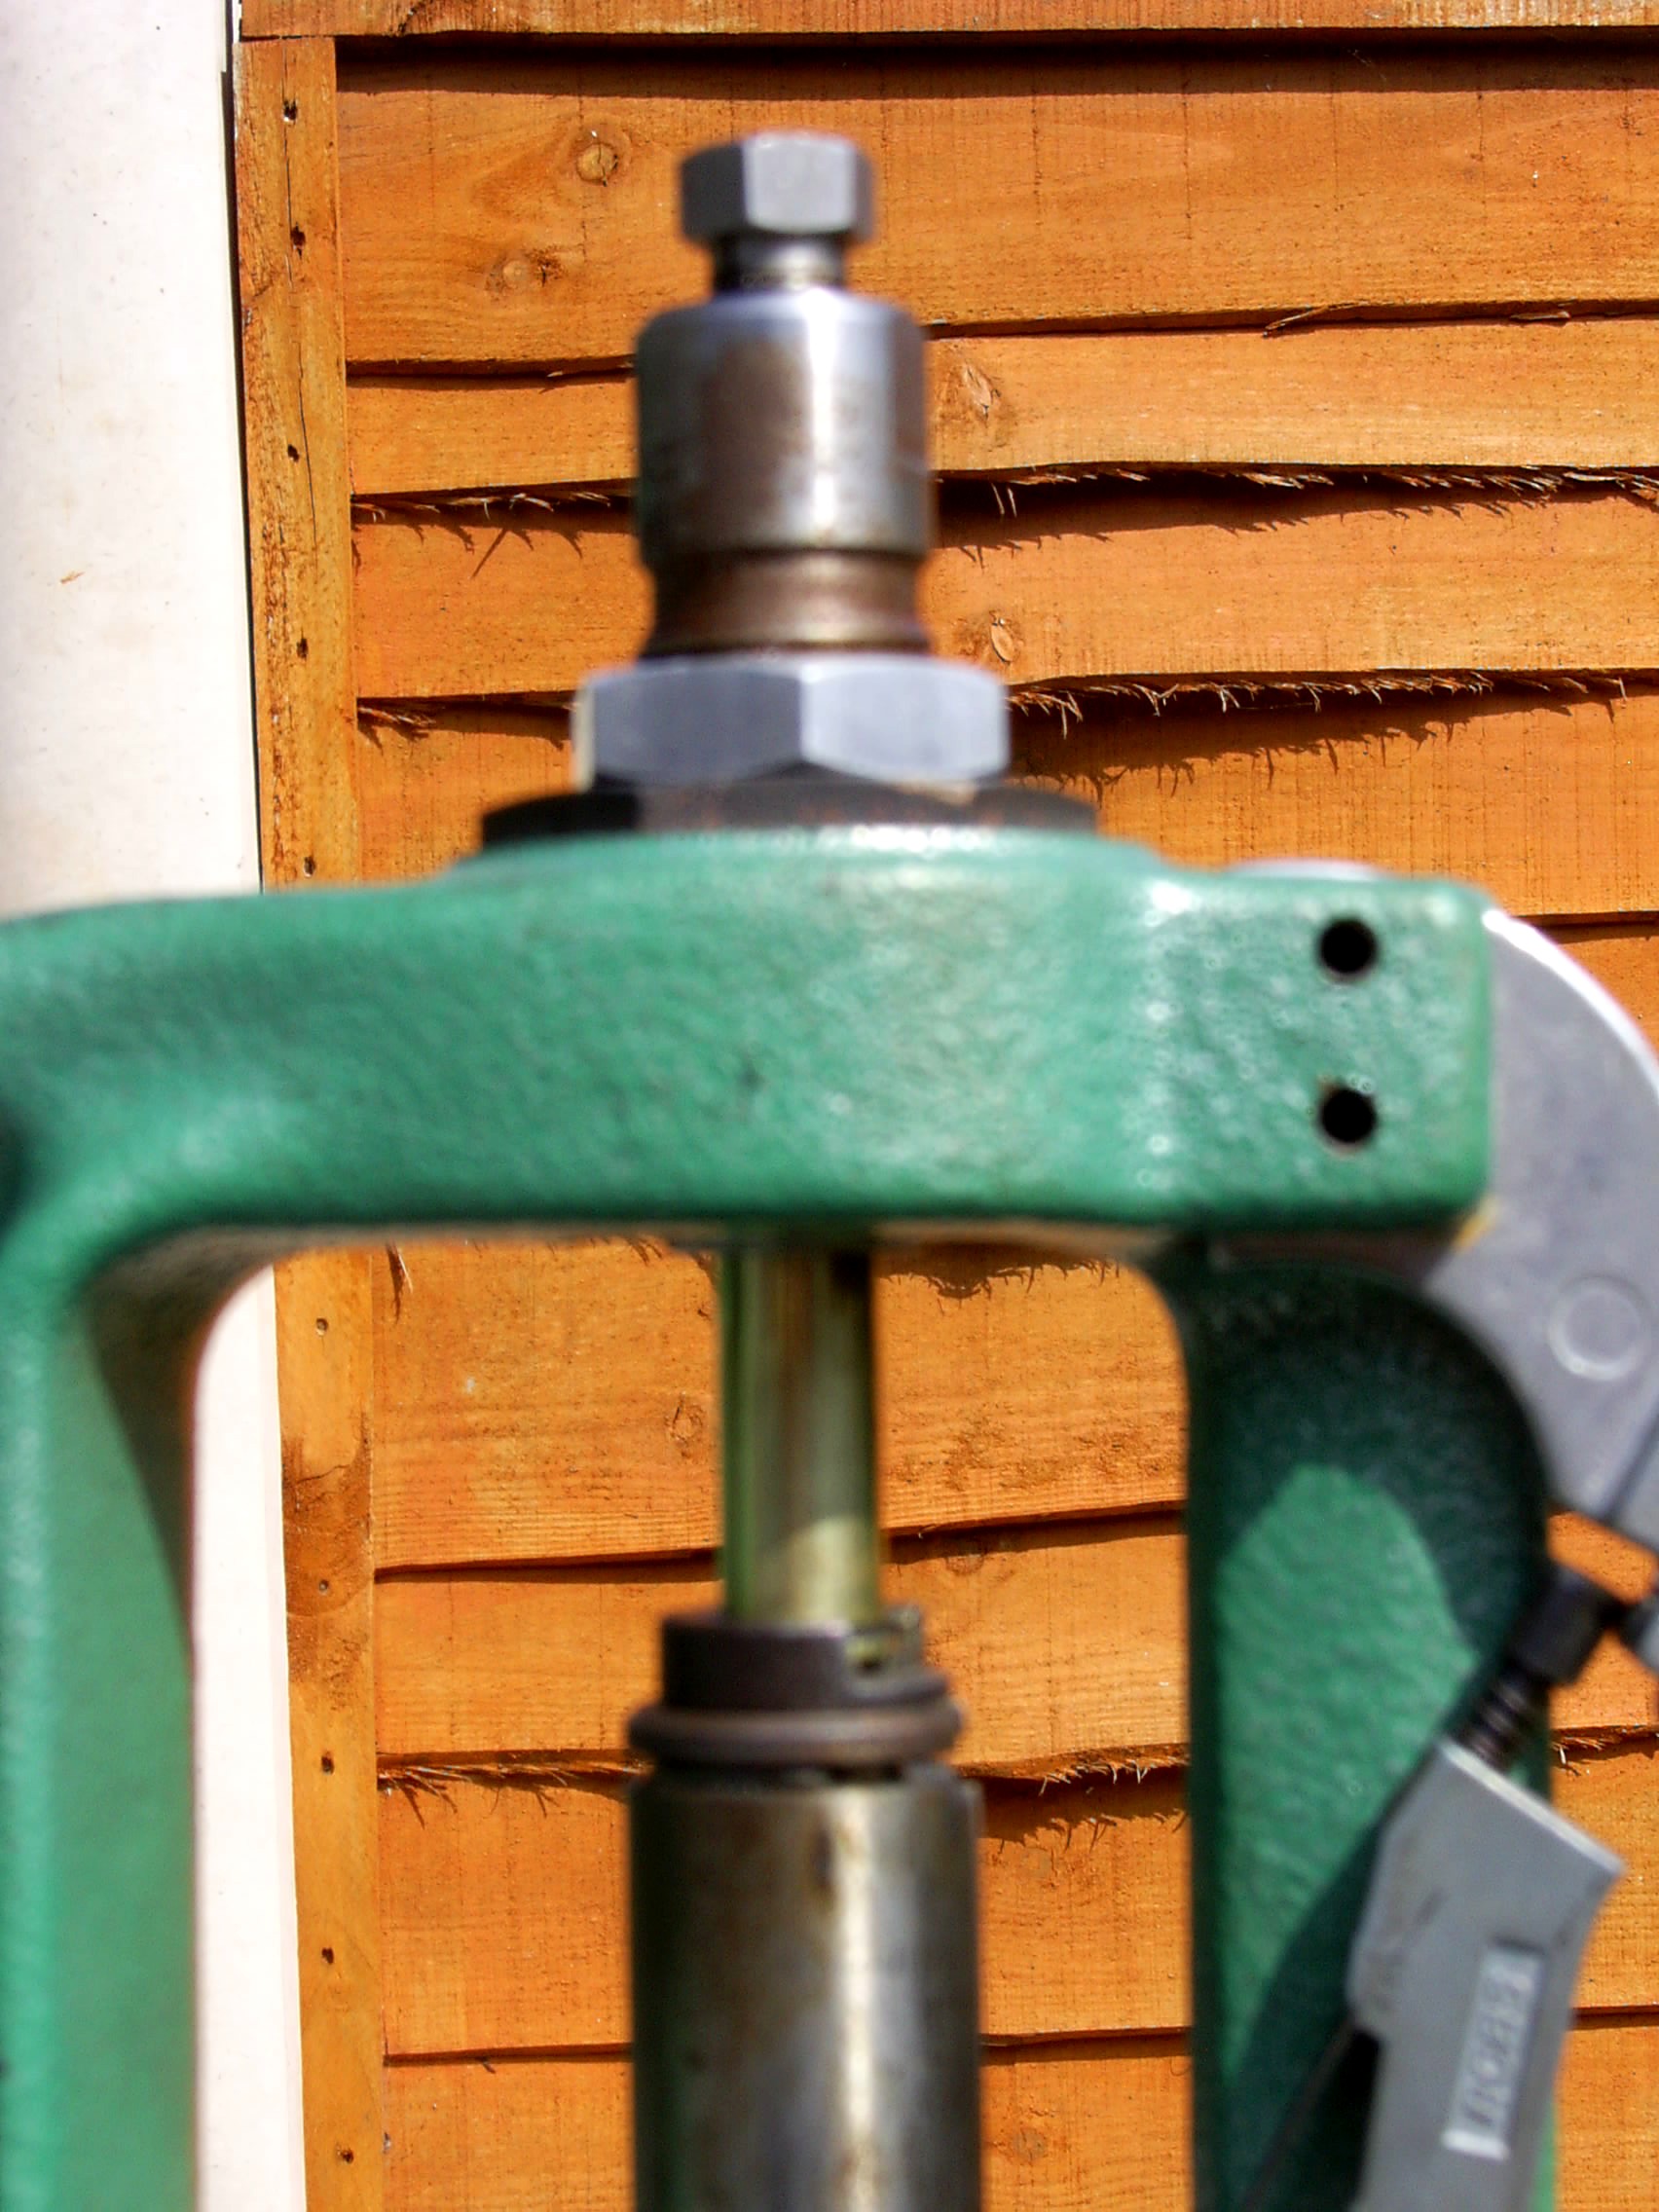
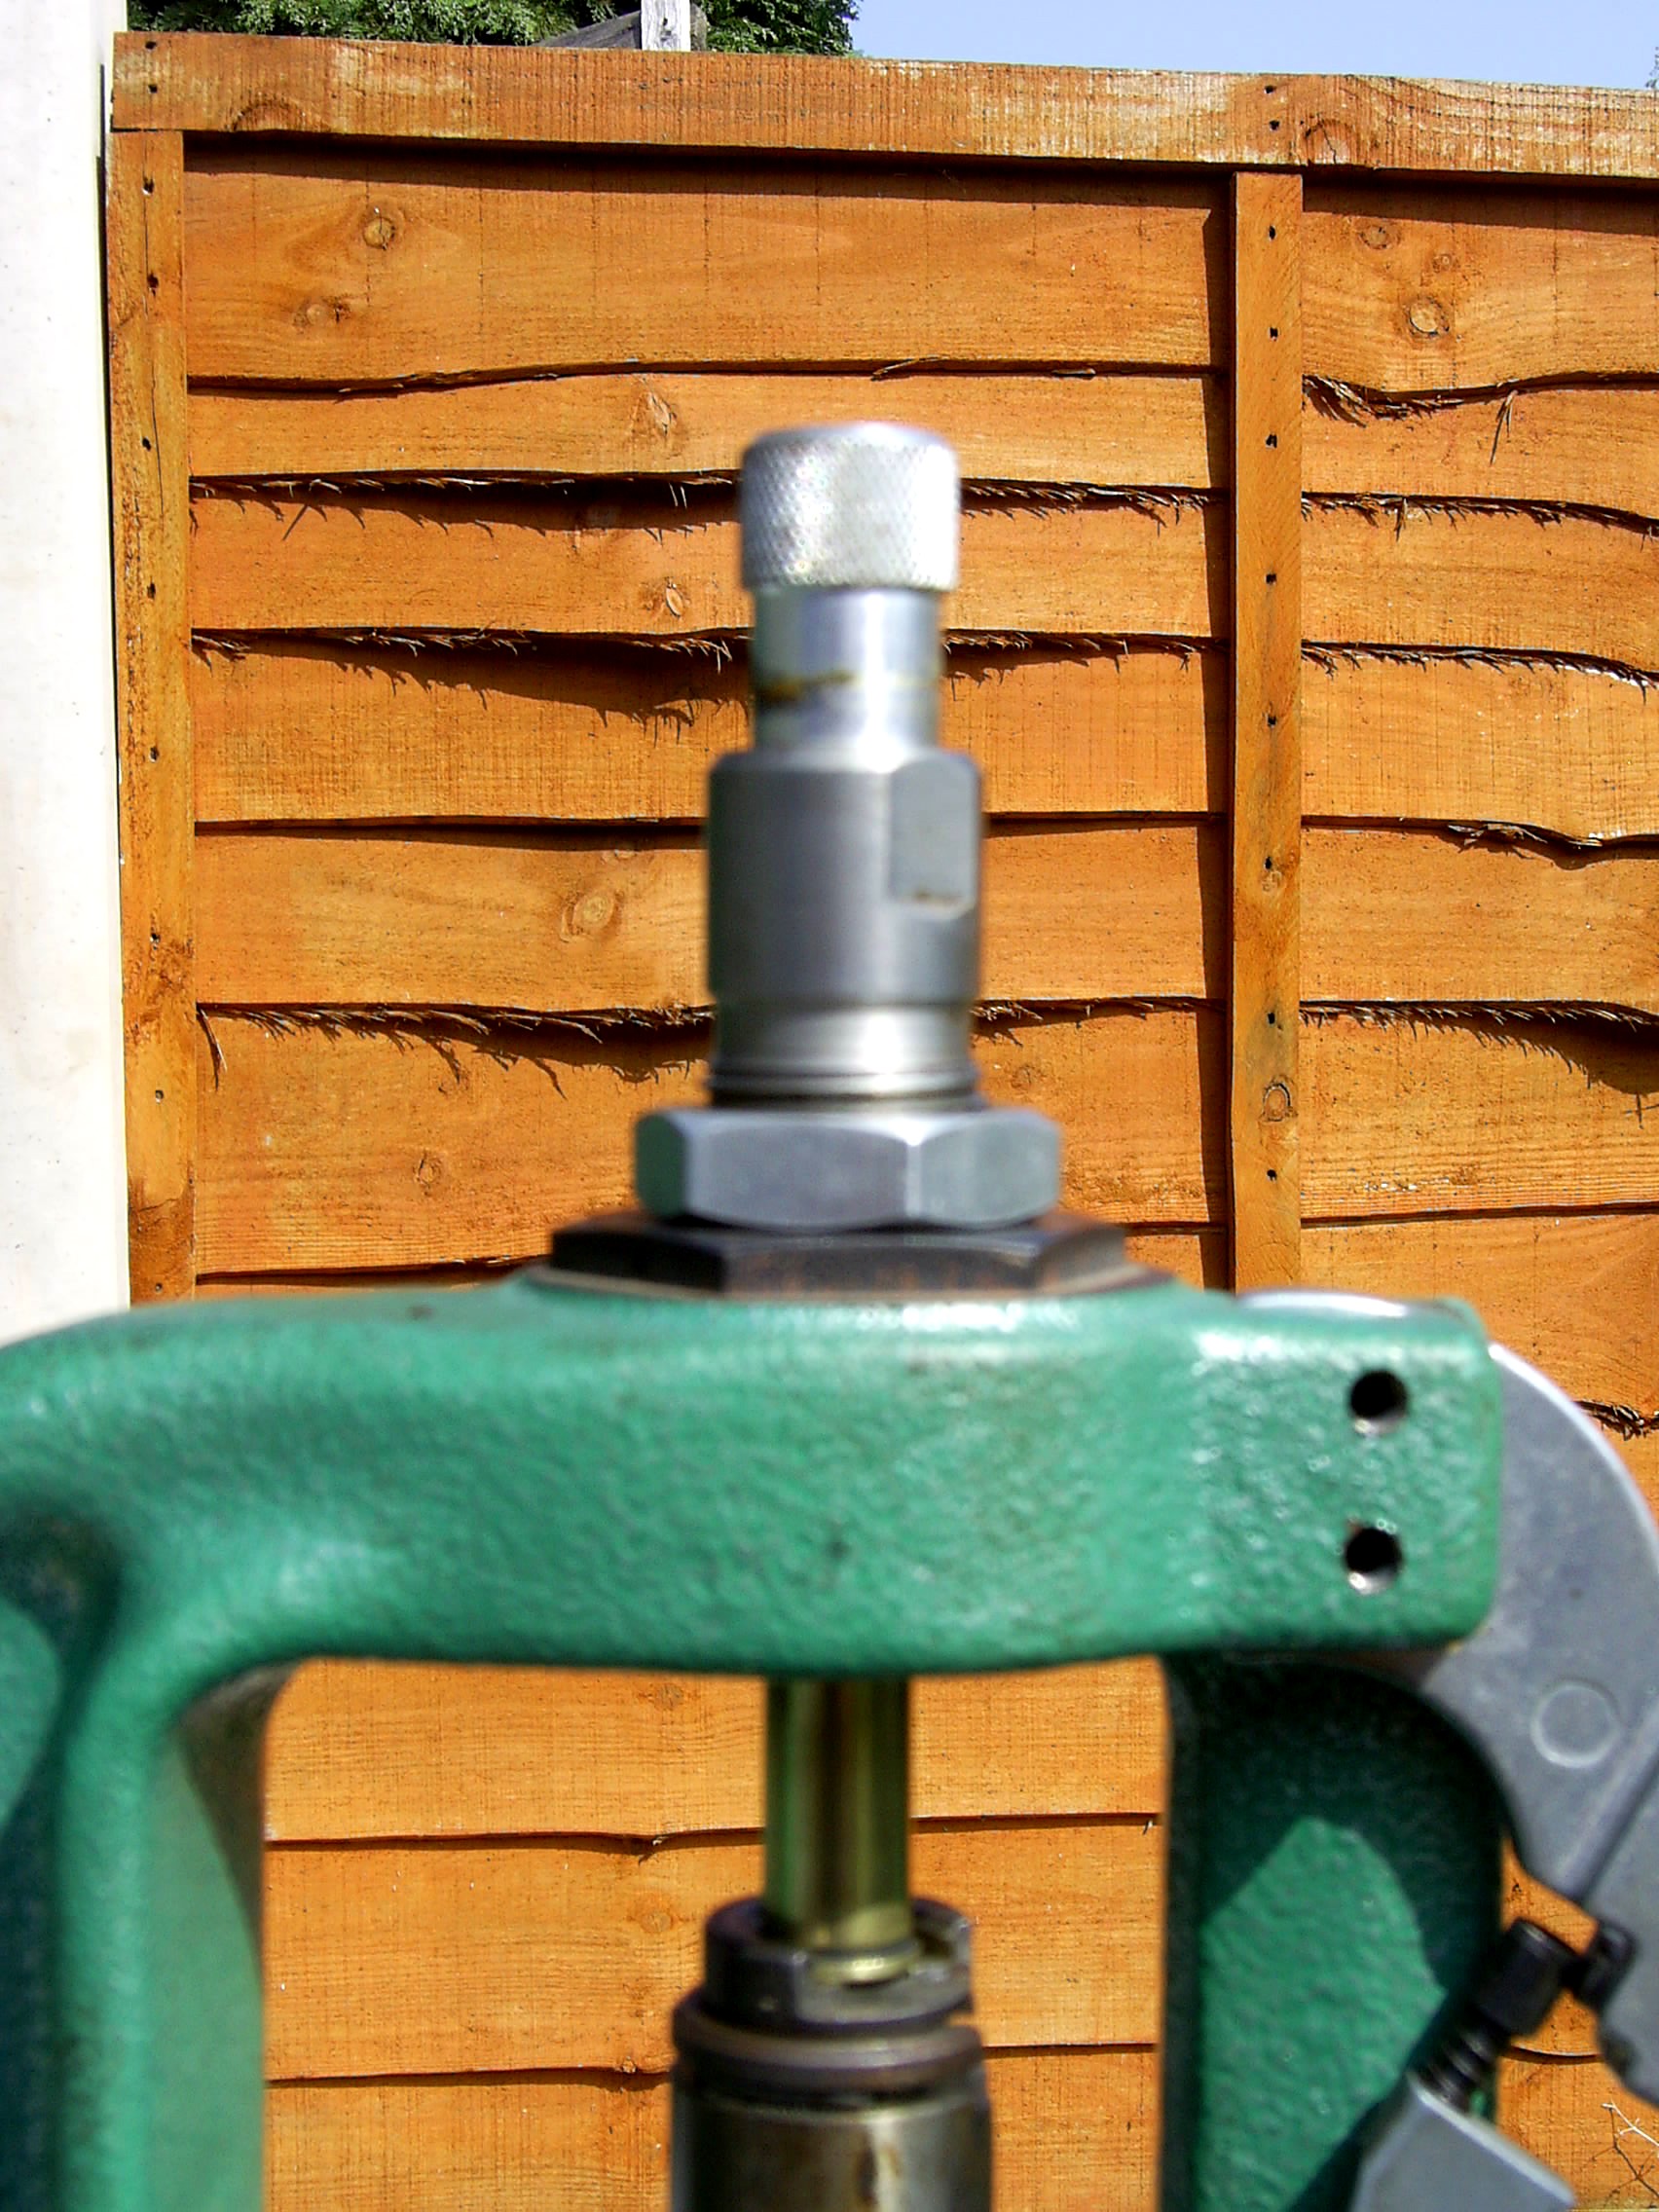
Step 4. Screw the decapping die into the top of the press until it touches the shellholder, then, holding the body of the die, screw the locking nut down until it locks against the top of the press.
Step 5. To check if the die is set up correctly, slide a case into the shellholder and run the case through the die. Is the spent primer pushed out of the case? If not, you may need to set the decapping rod further into the die. If everything is ok, remove the case from the die and remove the die from the press. Note always unscrew a die by holding the die body, not the locking nut.
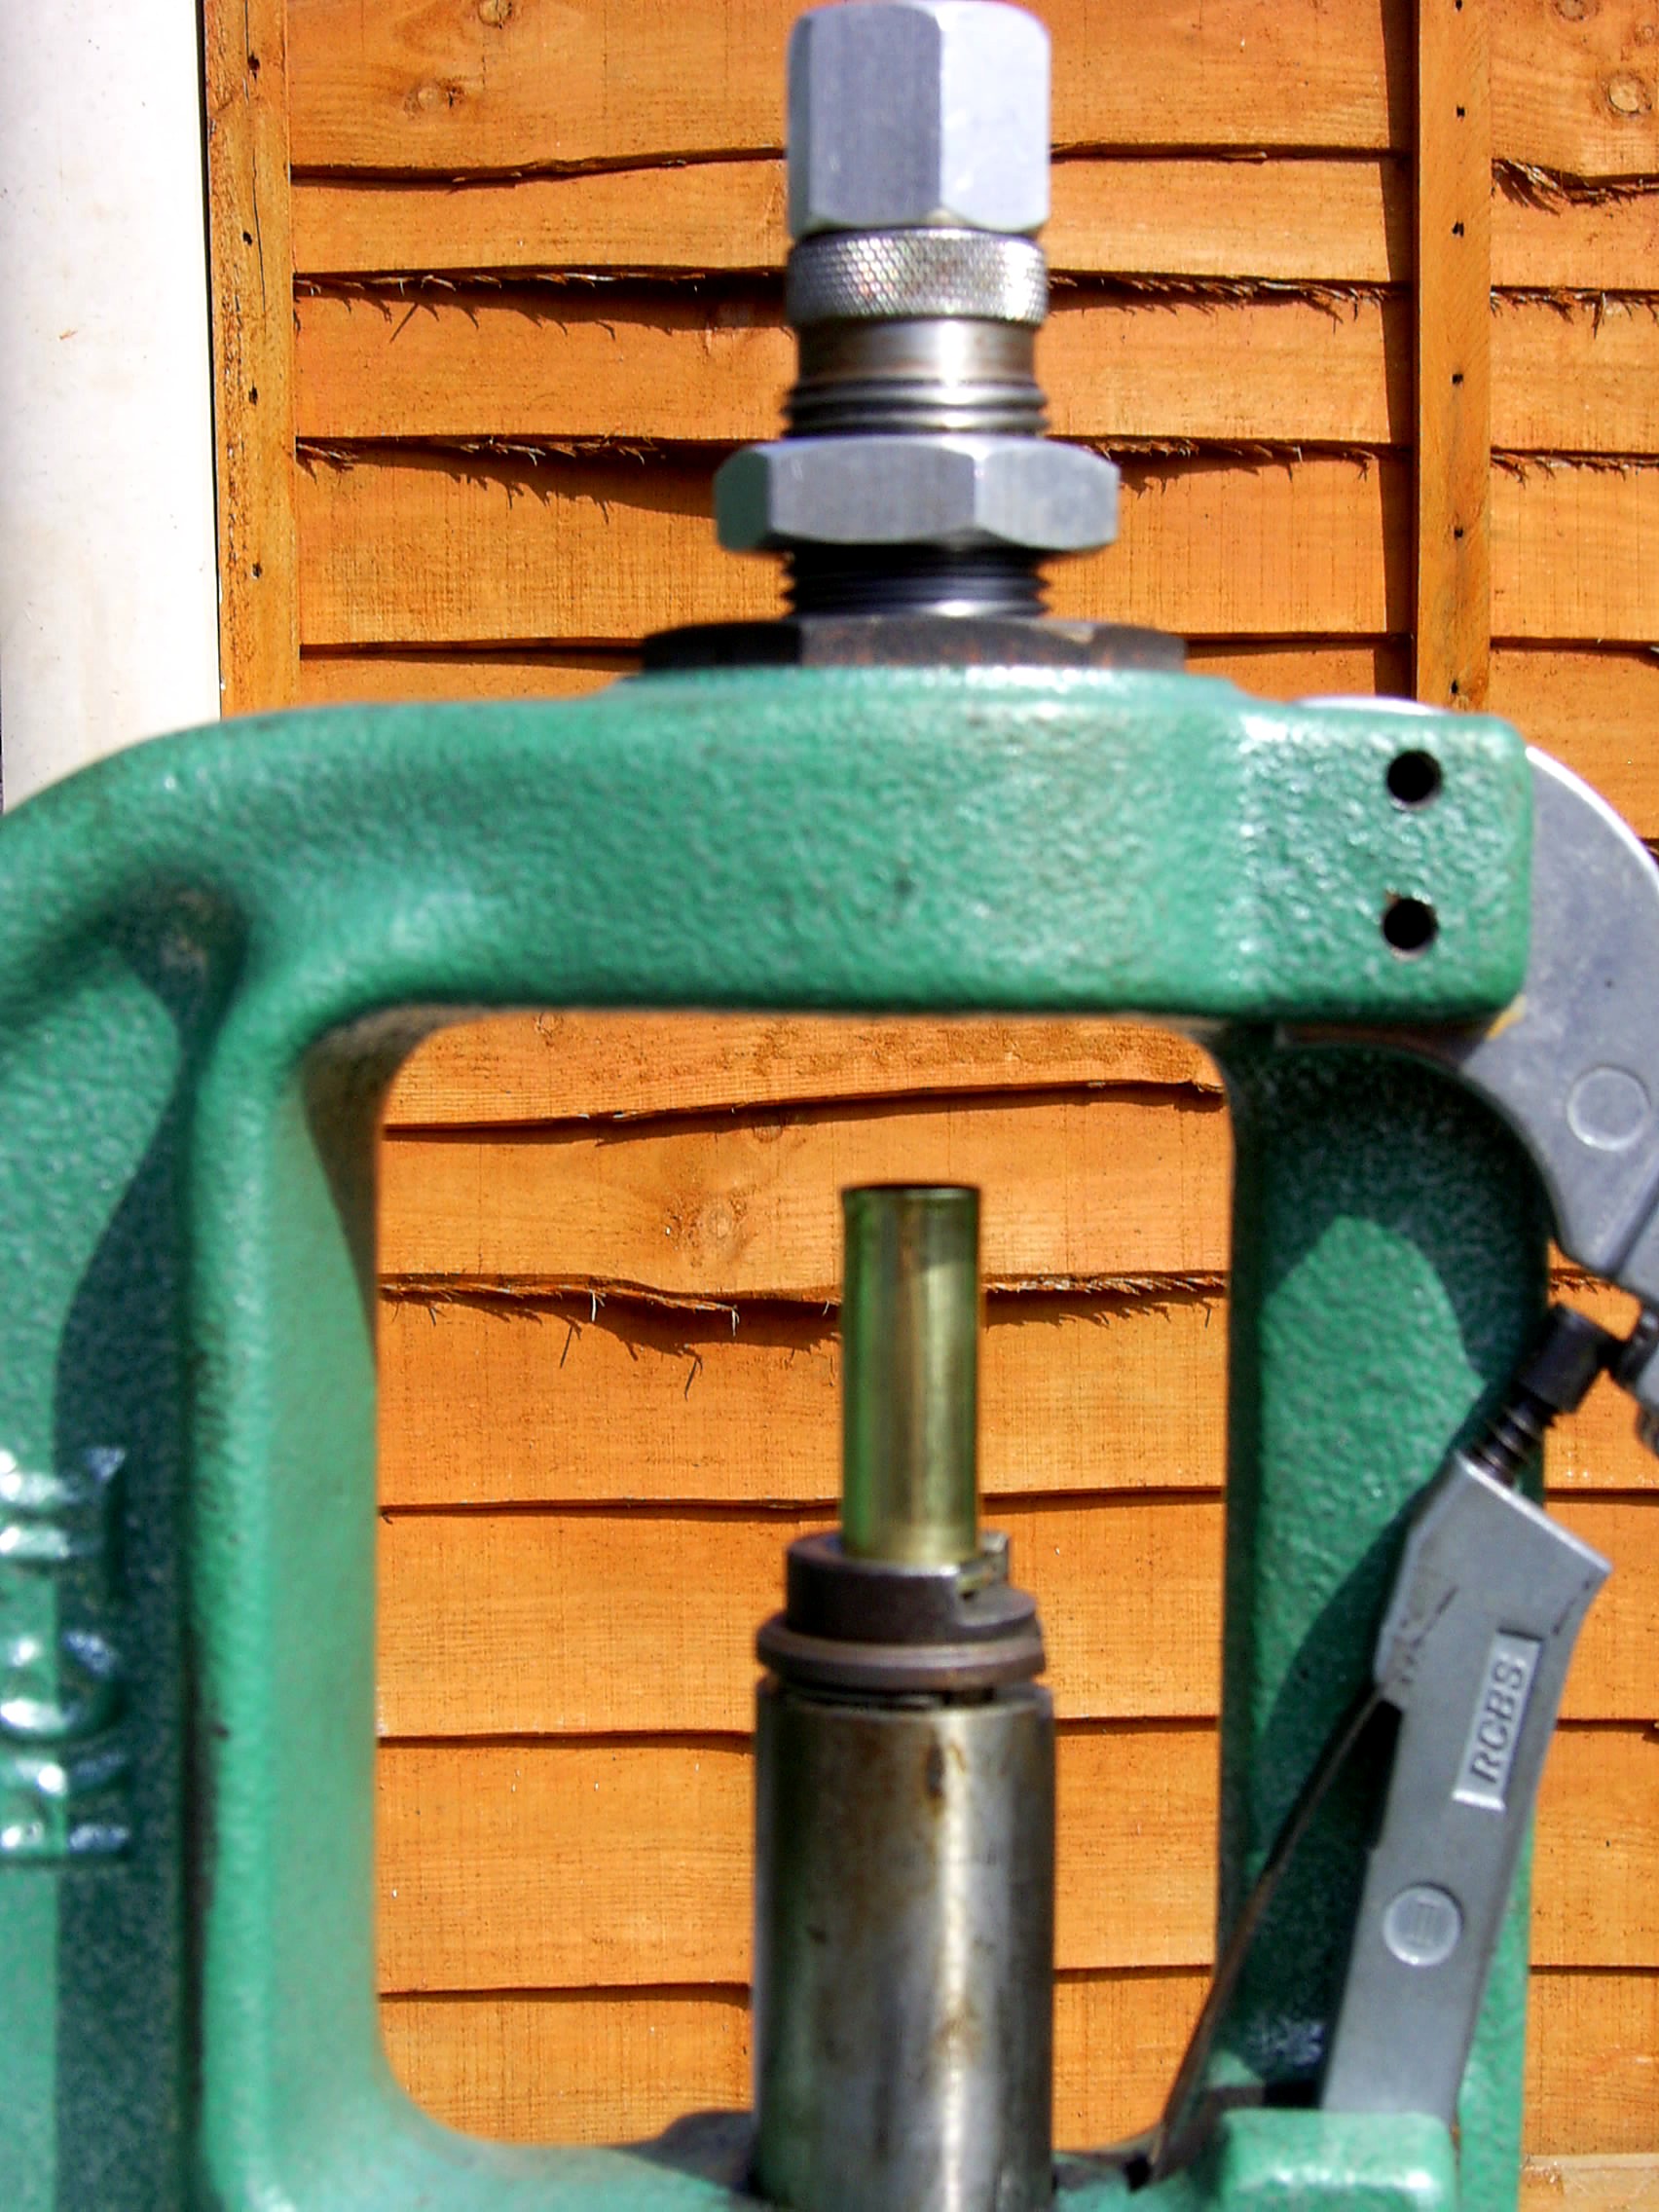
Step 6. Next, take the expander die (the one with the silver powder funnel adapter nut on the top) and, follow Step 2.
Step 7.Put the case you used to set the sizing die into the shellholder and follow Step 3.
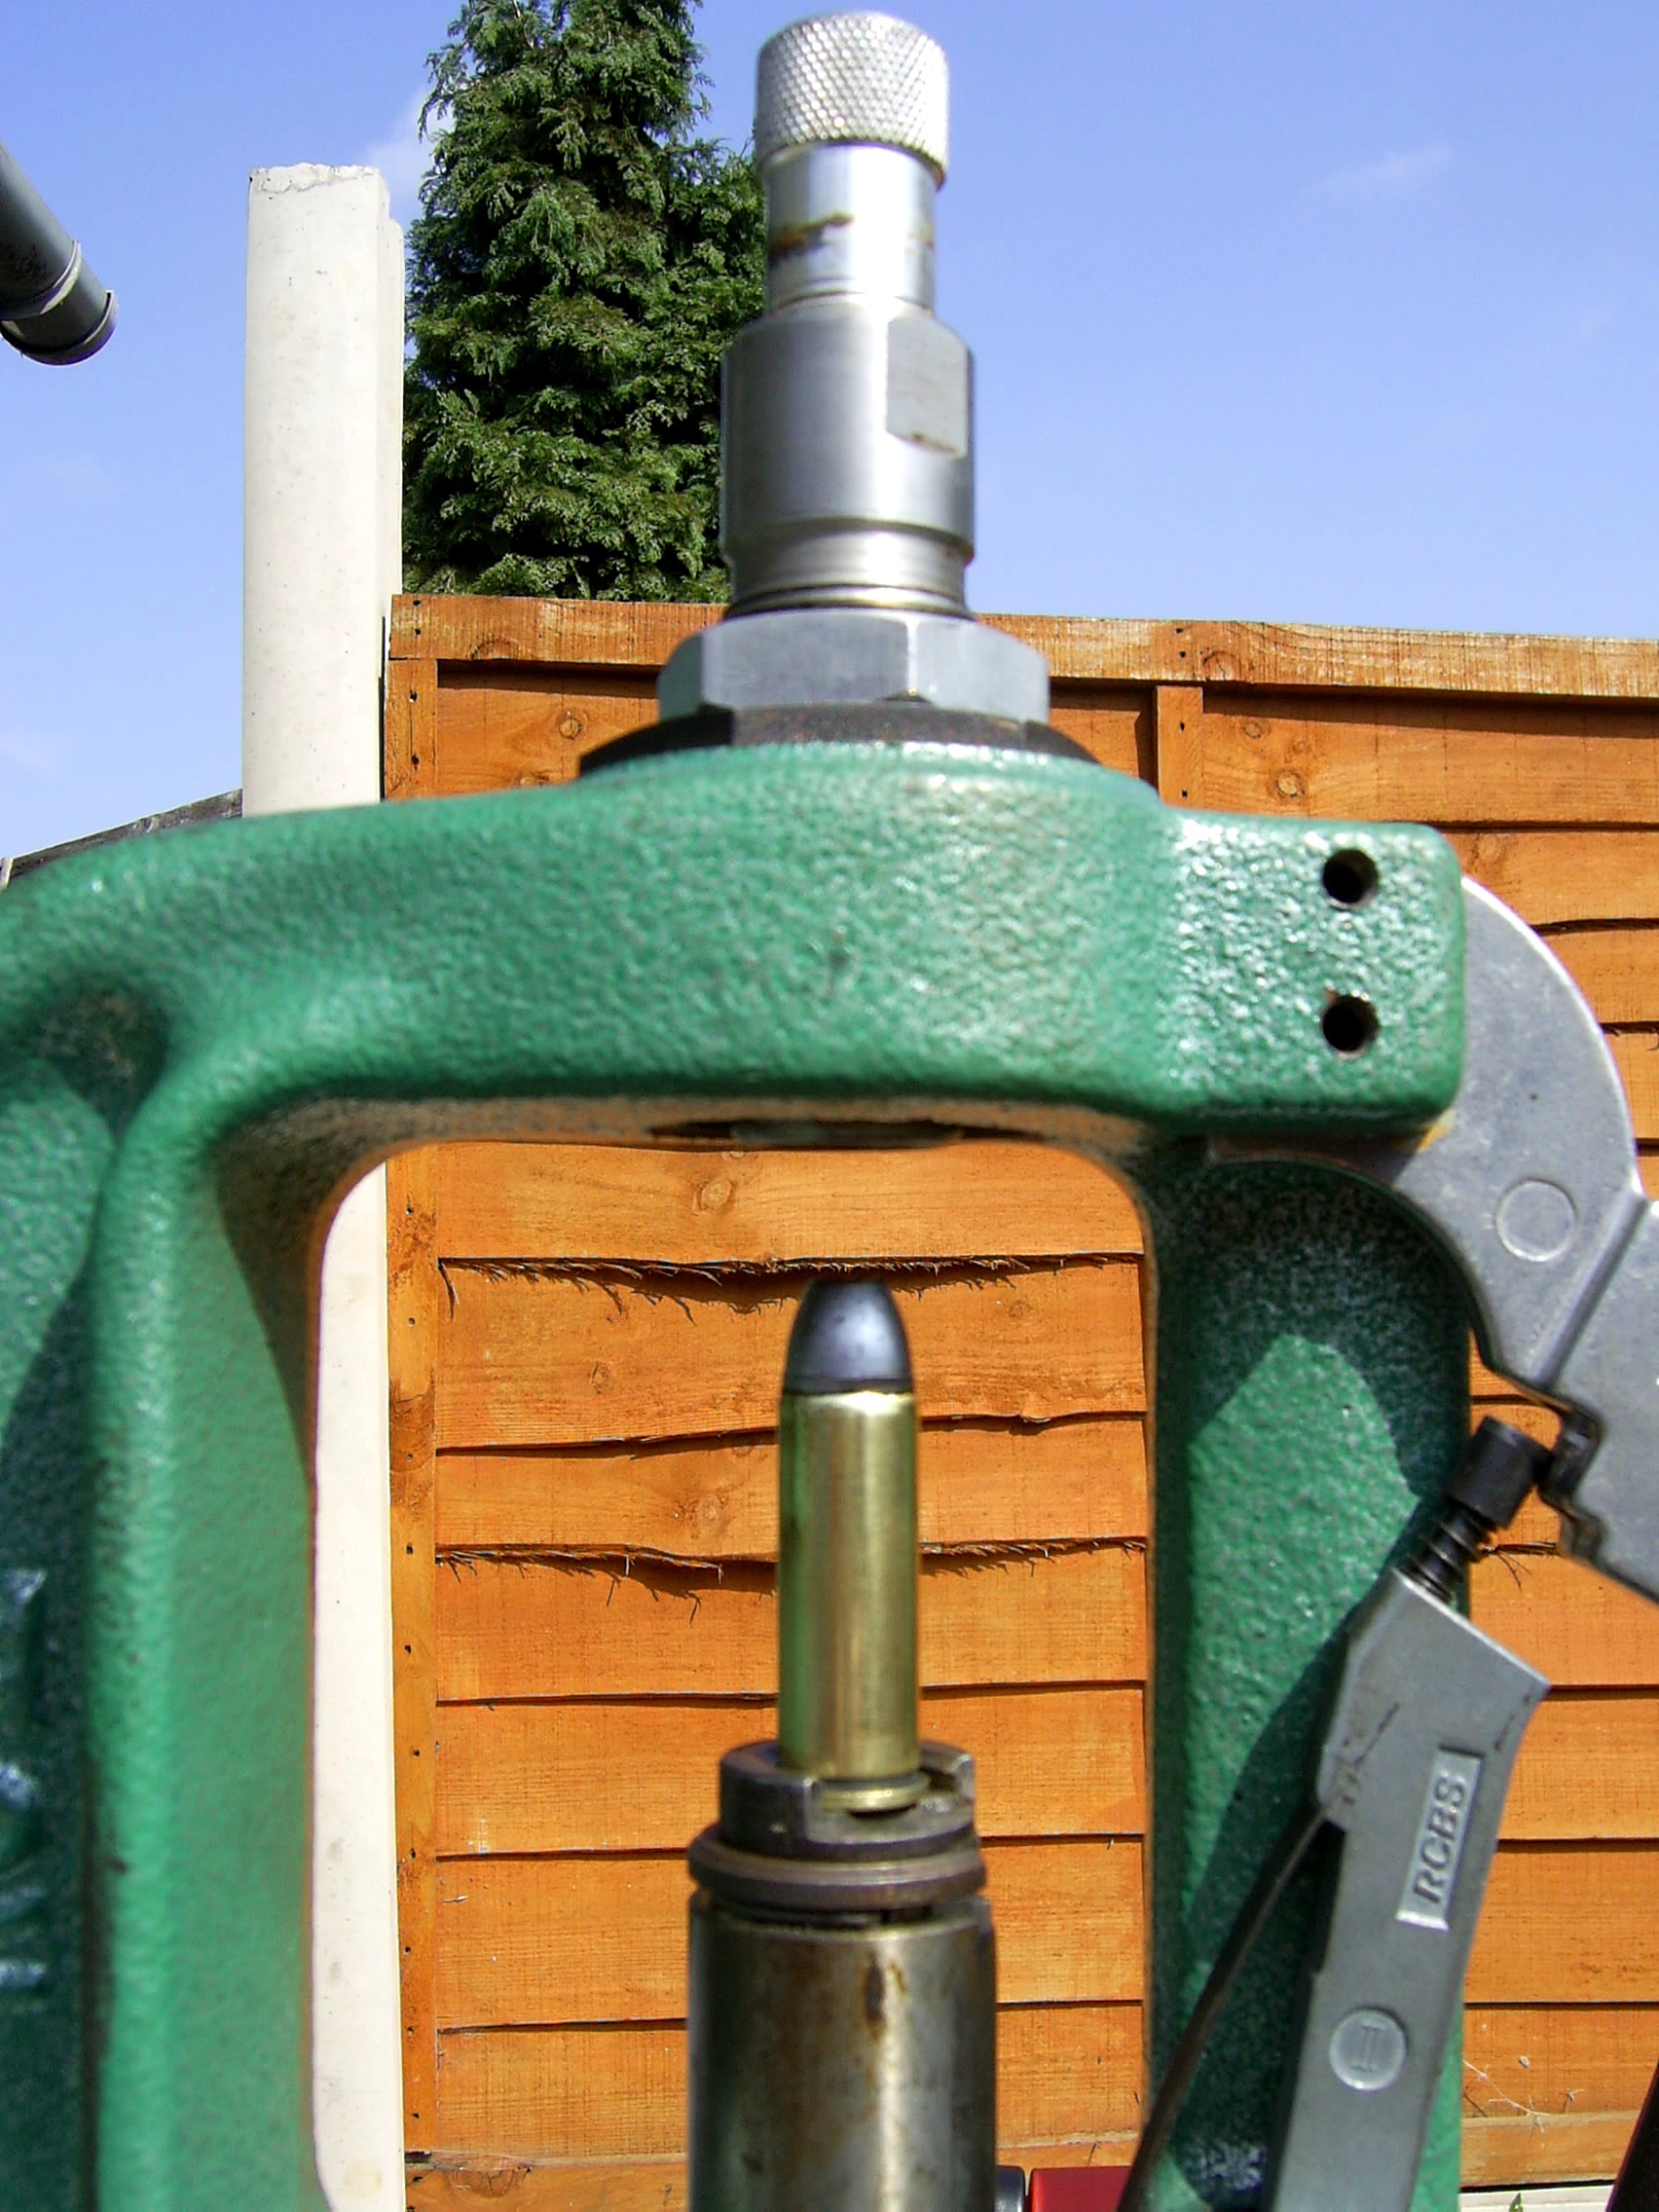
Step 8. Now, holding the lever of the press down, screw the expander die down into the press until you feel resistance and the lever try to rise.
Step 9. Lower the lever slightly and screw the die 1/8th of a turn into the press.
Step 10. Press down on the lever, then raise the lever and remove the case from the shellholder.
Step 11. Now, try to insert a bullet into the expanded case.
If the bullet will not sit in the mouth of the case, re insert the case into the shellholder and repeat Steps 9-11.
When the bullet sits in the case mouth, screw the locking nut down as in Step 3 and remove the die from the press.
 |
 |
 |
 |
 |
|
Fig. 17 : Step 1 |
Fig. 18 : Steps 2 - 4 |
Fig. 19 : Step 5 |
Fig. 20 : Steps 6 & 7 |
Fig. 21 : Steps 8 - 11 |
The best and easiest way to set the seater die is to use a dummy or inert round of ammunition that is a round of ammunition, which has no primer or powder in it.
Ha-ah, I hear you say. I haven’t got one of those.
Ok, then lets make one. You already have a sized and expanded case and a bullet of your choice, so all you need to do is seat the bullet to the correct depth in the case.
There are to ways to do this, the lo-tech and the hi-tech way. The lo-tech way is sit the bullet into the case and tap it down into the case using a soft wood or rubber mallet until the neck of the case is level with the top of the crimping groove or cannelure. The hi-tech way is the same as the lo-tech way, except you use a vice to push the bullet into the case. This method is a much more precise way to seat the bullet than using a mallet.
It is advisable to make a dummy round for each style of bullet that you use as they make adjusting the seating depth much easier when changing from one style of bullet to another. Just remember to screw out the adjuster nut before trying to reset the seating depth.
 |
|
Fig. 22 : Seating The Bullet, The Hi-Tech Way (Courtesy of Messrs. Black & Decker) |
When setting up the seater die for the first time, I always set the crimp first, then the bullet depth. You may need to assemble a few dummy rounds first, as explained above.
Step 1. Insert the dummy round into the shellholder and follow Step 2. Screw the knurled nut most of the way out of the seater die.
Step 2. Now follow Steps 8-10.
Step 3. Remove the round from the shellholder and check the crimp, the neck of the case should be just rolled into the crimping groove on the bullet.
Step 4. If required, either back the die out or screw it into the press and run the dummy round through the die until the desired amount of crimp is achieved. If there is too much crimp, you will have to use another round to check the crimp after adjusting the die.
Step 5. Screw down the locking ring until it locks against the top of the press.
Step 6. Raise the case into the die and then screw the knurled nut down into the press until it contacts the bullet head.
 |
 |
 |
||
| Fig. 23 : Step 2 & 3 | Fig. 24 : Steps 4 & 5 | Fig. 25 : Step 6 |
Your dies are now set.
Ammunition Assembly
Stage 1. Screw the sizer die into the press, and size as many cases as are needed. Most people resize all their cases in one sitting.
Stage 2. Prime the cases, at this stage you can prime some or all of your sized cases, it’s up to you.
Stage 3. Powder charging and expanding the cases. First thing to do is to replace the sizer die with the expander die. Now remove the funnel adapter nut from the die and screw the Pro ADM into the die. Do not loose the nut.
To be cont'd